Managing the Event Agenda
The Agenda module provides the ability to enter the agenda items manually or by uploading an external .csv agenda file. For information on creating an agenda file for upload, see Creating an Event Agenda File.
Using the Gallery Site Editor, you can create or upload an event agenda using the Agenda module. To access the Agenda module, follow these steps.
- Click the experience name to open the Gallery Site Editor.
In the left navigation, click Site Features > Agenda.
Creating a new agenda
To create a new agenda for the experience, click in the Agenda module.

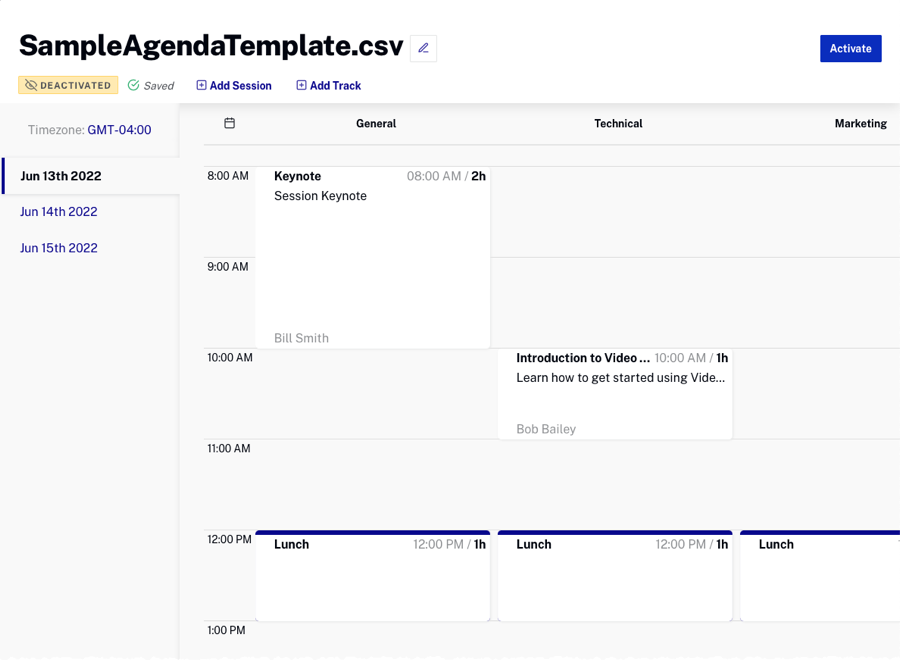
The agenda Status will be DEACTIVATED which indicates that the agenda will not be displayed in the Virtual Event Experience. Click on the Event name to add tracks and sessions.
Importing an agenda file
The Agenda module provides the ability to import an agenda .csv file. This provides an alternate way of creating sessions without having to use the Agenda UI. A sample file can be downloaded by clicking on the Download agenda template link at the top of the My agenda page. The Agenda module can only import .csv files.
To import an agenda file, follow these steps.
- Click .
- Browse and select the agenda file to upload.
- Confirm the agenda is listed on the My agenda page.

If any errors occur during the agenda import, a message will be displayed. After the import, the agenda Status will be DEACTIVATED which indicates that the agenda will not be displayed in the Virtual Event Experience.
Deleting the agenda
To delete the agenda, click the delete icon (![]() ) next to the agenda and then confirm the delete.
) next to the agenda and then confirm the delete.
Exporting the agenda file
The Agenda module provides the ability to export the agenda. Exporting the agenda can be useful when:
- You want to export an event agenda to edit and then use in another experience
- An event planner wants to to export a copy of the agenda and work with it in Microsoft Excel or another tool
To export the agenda, click the download icon (![]() ) next to the agenda.
) next to the agenda.
Editing the agenda title
The agenda title will be displayed on the experience homepage above the agenda. To edit the agenda title, click on the Event name to open the agenda editor. Click the edit icon (![]() ), enter a title and then press enter.
), enter a title and then press enter.

Editing the agenda
After an agenda file has been created, it will appear on the My agenda page. To view the agenda details, click on the Event name. The agenda editor will open displaying the details.

Click a date on the left side of the page to view the agenda for that day. The tracks are displayed as column headers at the top of the page.
Adding a session
To add a new session, follow these steps.
- Click on the agenda to open the agenda editor.
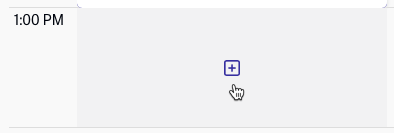
- Click on an open time slot or click at the top of the page
.

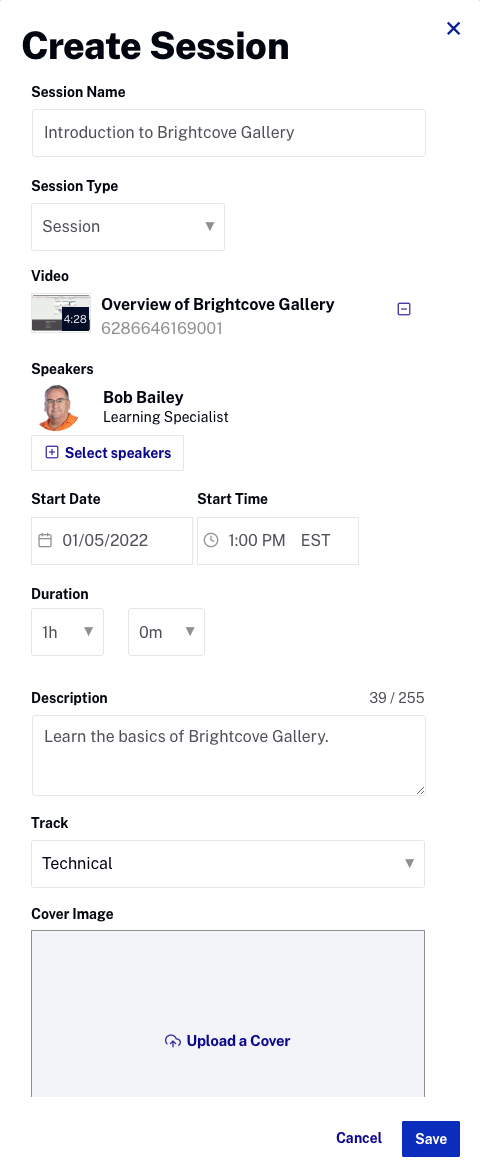
- Enter the session information.
- Session Name
- Session Type
- Session
- Keynote
- Meeting
- Other
- Session Type Parameters - Based upon the Session Type that is selected, additional parameters will be displayed:
- Video - Click Add video and select the video to display for this session (available with Session, Keynote and Other session types)
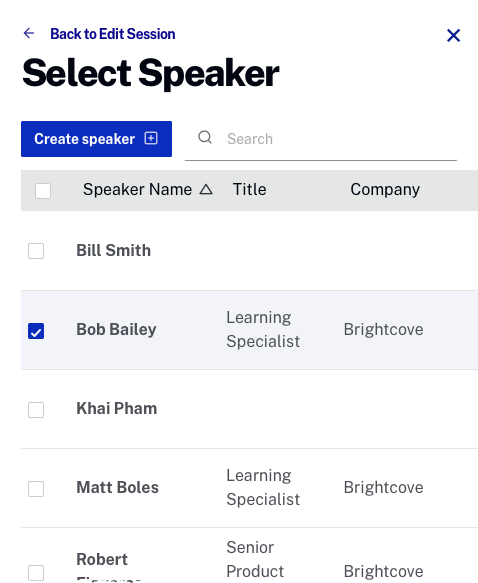
- Speakers - Click Select speakers and select one or more speakers for the session
- Start Date
- Start Time
- Duration - Session duration
- Description
- Track - Select a track to assign the session to; see the Adding a new track section below for details on adding new tracks
- Cover Image - The cover image appears with the session in the agenda display
- Related Content - Can be used to provide a link to session content, for example, handouts or slides
- Label - Label for the content
- URL - Link to the content

- Click .
Confirm the session is added to the agenda. If there are multiple sessions in the same track scheduled at the same time, they will be highlighted and appear next to each other.

To resolve session overlaps, edit a session and change the time or drag a session to a new time slot.
Editing and deleting sessions
To edit or delete a session, click on a session to open the Edit Session panel. To edit the session, make any changes and click . To delete the session, click .
Adding speakers to a session
To add speaker(s) to a session, follow these steps.
- Click on a session to open the session editor.
- Click .
- Select one or more speakers or click to create a new speaker.

- Click .
Adding a new track
Tracks are used to group related sessions. For example, a Marketing track might have all of the marketing related sessions. An agenda will typically have multiple tracks. To add a new track, follow these steps.
- Click on the agenda to open the agenda editor.
- Click at the top of the agenda. A new Unnamed Track will be created. You may have to horizontally scroll the agenda to view it.
- Click on the Unnamed Track to edit the name.

- Press enter to save the change.
Editing a track
To edit a track, click on the track name, make any changes and press enter to save the changes.

Reordering tracks
To change the order of tracks in the agenda, follow these steps.
- Click on the agenda to open the agenda editor.
- Hover over the track name to move, click the grab icon and drag the track to the new location.

Activating and deactivating an agenda
The agenda status determines whether or not the agenda will be displayed in the associated Virtual Event Experience. The status is displayed in the page header below the agenda name.

- ACTIVATED - The agenda will be displayed
- DEACTIVATED - The agenda will not be displayed
To activate an agenda, click at the top of the page. To deactivate an agenda, click on it and click . Note that after activating/deactivating an agenda, the experience doesn't need to be republished.
