Step-by-Step: Creating and Publishing an Embed Experience
After completing this Quick Start, you should be able to:
- Use Gallery to create a new experience
- Add videos to an Embed Experience
- Customize and style an Embed Experience
- Preview and publish an Embed Experience
Audience
Any Video Cloud publisher who wants to create Embed Experiences that can be embedded in web pages.
Prerequisites
- A Video Cloud account with access to the Gallery module
- Working knowledge of Video Cloud
- The sample videos used in this Quick Start are available for download if needed
- Helpful to view the Building Embed Experiences using Gallery training
Using the Quick Start assets
If you would like to follow along using the sample videos provided with this Quick Start, perform the following steps.
- Download the sample file.
- Use the Upload module to upload the videos to your Video Cloud account.
- Use the Media module to create an Animals playlist and add the videos to the playlist.
- Use the Players module to create a new Brightcove Player called Gallery Player.
Using Gallery to create an Embed Experience
To create an Embed Experience using Brightcove Gallery, you will complete the following tasks:
Selecting an account
Depending on your Video Cloud subscription, you may have access to multiple Video Cloud accounts. Before getting started, make sure you are using the correct account.
- Login to Video Cloud Studio.
- The current Video Cloud account name will appear in the upper right corner of the page. If you have multiple accounts, click the account selector drop down and select the account you would like to create the Embed Experience in. Note that this should also be the account that has the videos you want to use as well.
- In the primary navigation, click Gallery.
Creating a new Embed Experience
To create a new Embed Experience, follow these steps.
- If you haven't created any experiences, a no projects page will appear. Click next to Embed.

If you have existing experiences, click and then click the Embed tab at the top of the page.
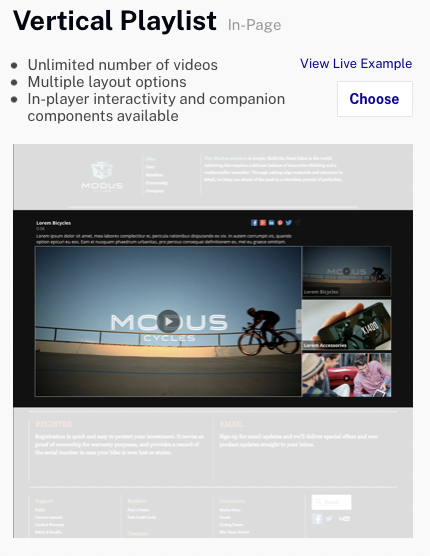
- A list of Embed Experience templates will be displayed. Locate the Vertical Playlist template and click .
- Enter an Experience Title and Experience Description. For the Layout Size, select Responsive.
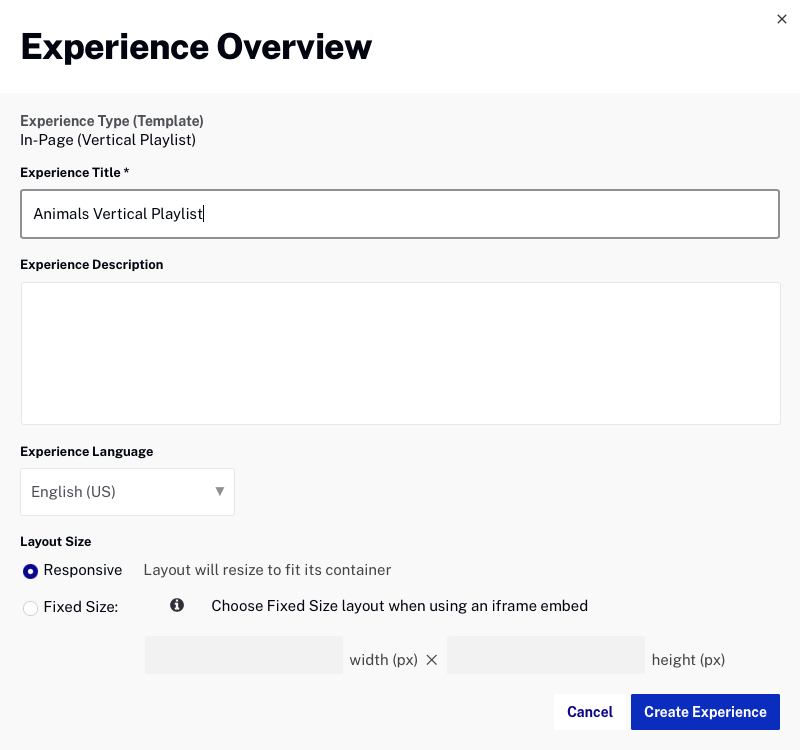
- Click .
The layout editor will open. The experience title will appear at the top of the page. The title can be changed as part of the experience details.
Customizing the experience
Objects can be added to the experience to customize the appearance. Embed Experiences have different states and each state can be customized. The following states are available to customize:
- BEFORE PLAY - How the experience will appear when first rendered, before any video playback has started
- PLAYING - How the experience will appear when a video is being played
- AFTER PLAY - How the experience will appear after a video plays

To edit the different states, click a state and then add components to the experience as needed. For more information, see Customizing an Embed Experience.
To add objects to an Embed Experience, follow these steps.
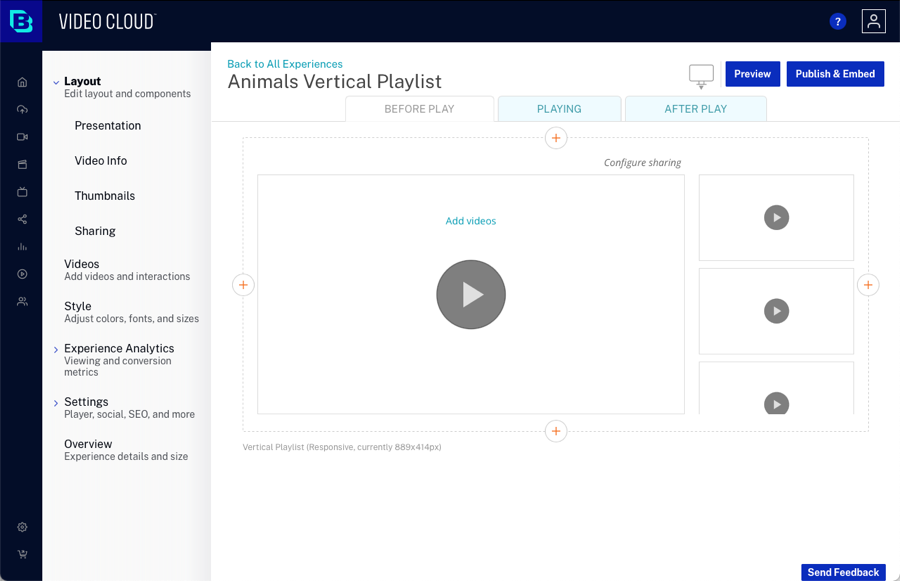
- Click Layout in the left navigation.
- Click the BEFORE PLAY state. Plus icons (
 ) indicate where components can be added to the experience. Click the plus icon at the top of the experience. The component picker will open.
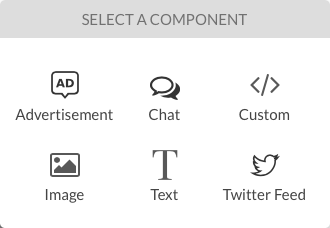
- Click on the Image component. Click the browse link and select an image to use as a header for the experience. Note that the Quick Start sample files include an image that can be used.
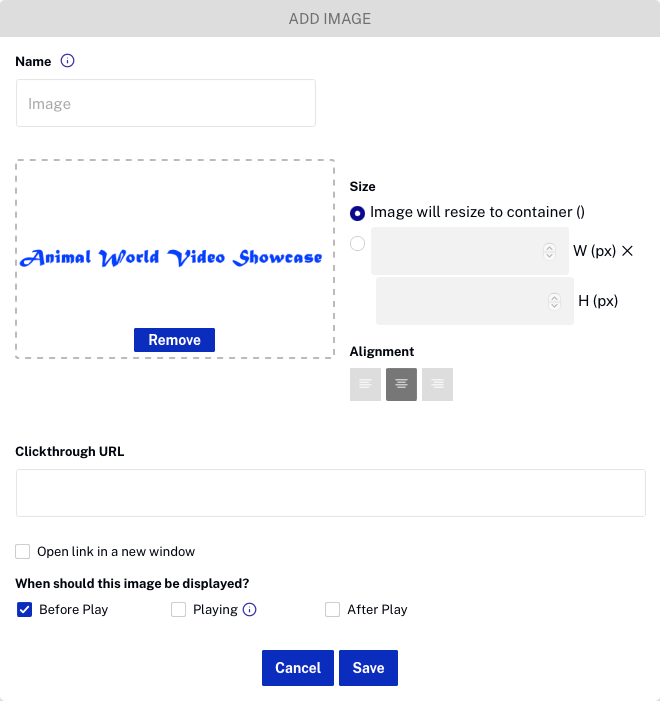
- Click . The image will appear on the experience.

- Click the plus icon above the image component and add a Text component to the experience. Enter some text and then click .
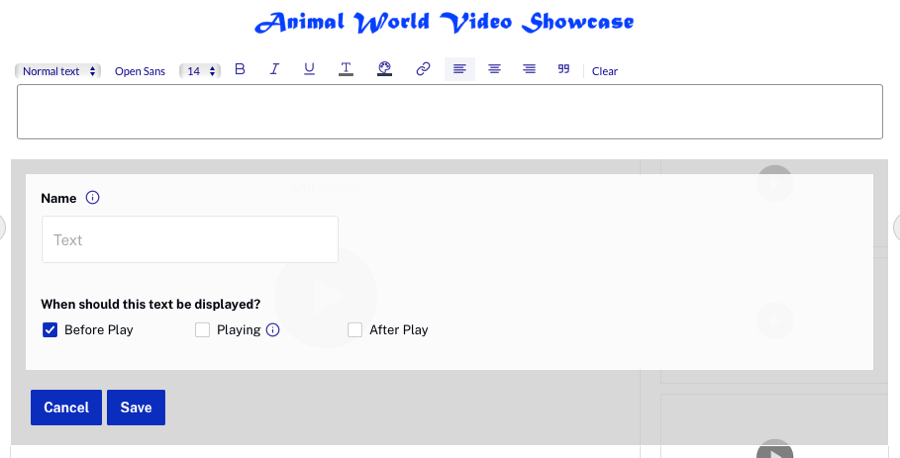
- Confirm that the image and text appear on the experience.
To edit any of the component properties, or to delete a component, hover over the component and click the edit or delete icons.
Adding videos to the experience
Depending on the template that was selected, the experience may display one or more videos at a time. Videos can be manually added to an experience, a playlist can be selected or a reference ID can be provided. For more information on adding videos to an Embed Experience, see Adding Videos to an Embed Experience.
To add videos to an Embed Experience, follow these steps.
- Click Videos in the left navigation.
- Click .
- Select a Method of Select Videos to manually select videos to add, OR, select a Method of Select Playlist and browse and select the Animals playlist you created with the sample videos.
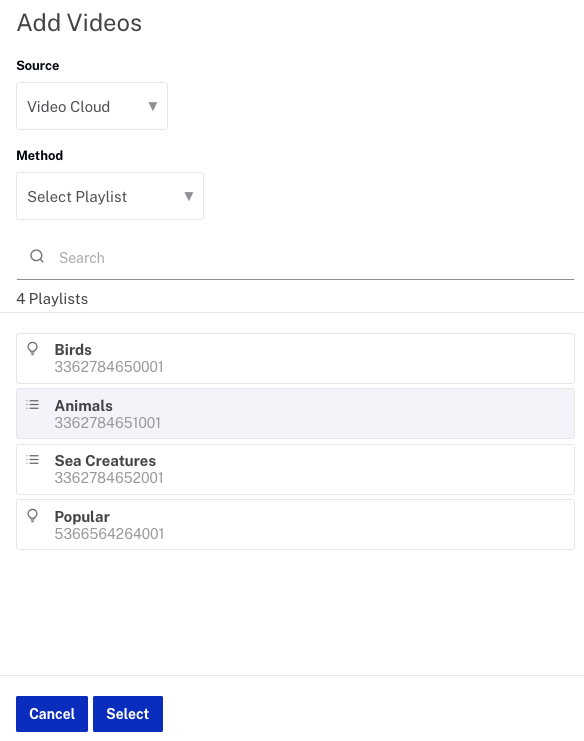
- Click . The list of videos will display.
Adding interactivity to a video
Link and card interactions can be added to videos. Interactions are displayed as the video is played. For more information on adding interactivity to an experience, see Adding Interactions to an Embed Experience.
To configure interactivity for a video, follow these steps.
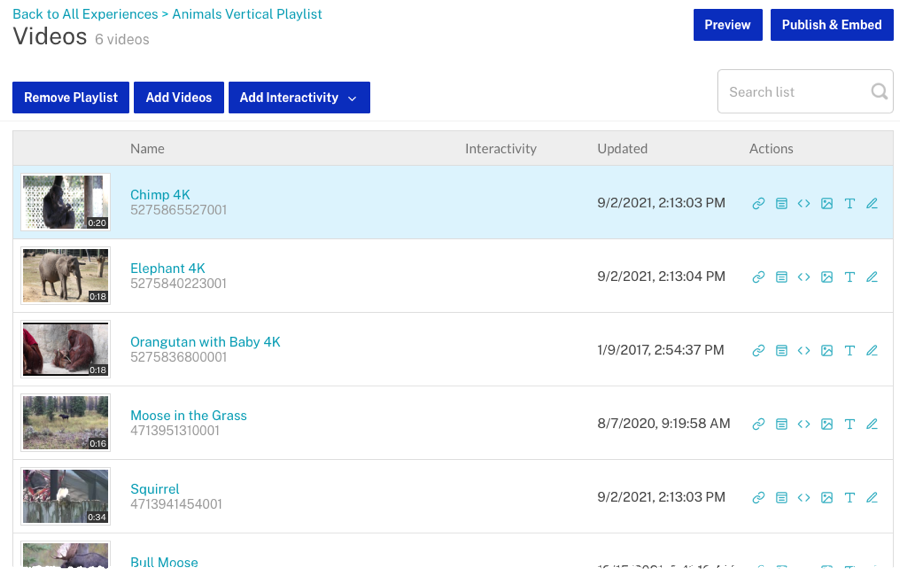
- Click Videos in the left navigation.
- Select a video to add interactivity to and click the link icon (
 ) in the Actions column.
 - Add Link Text and a Link URL. The preview player will display a preview of the link.
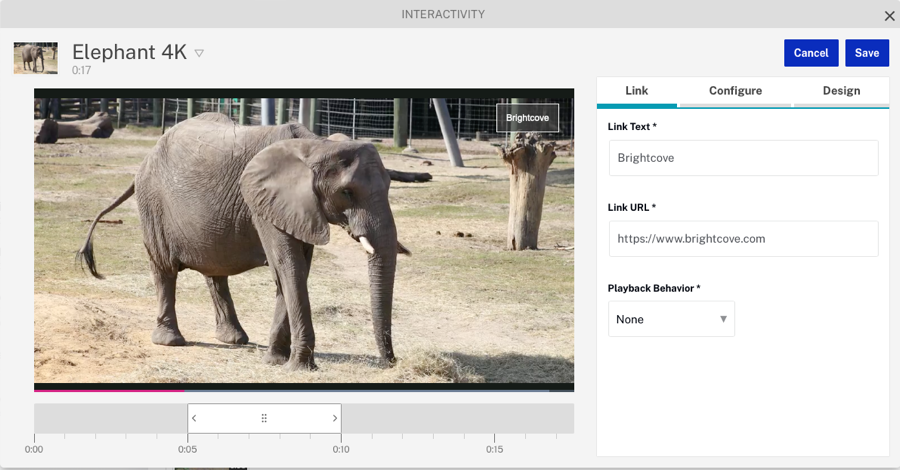
- Click the Configure link.
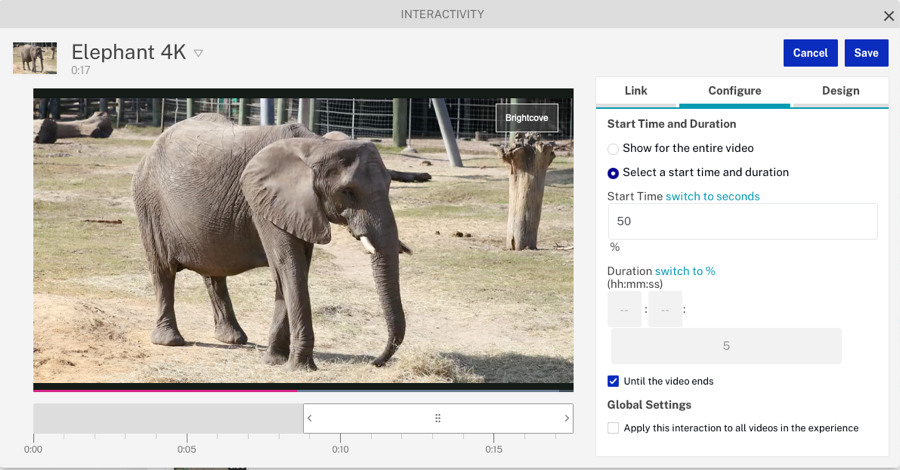
- Click the switch to % link. Set the Start Time to be the 50% point in the video.
- For the Duration, check Until the video ends.
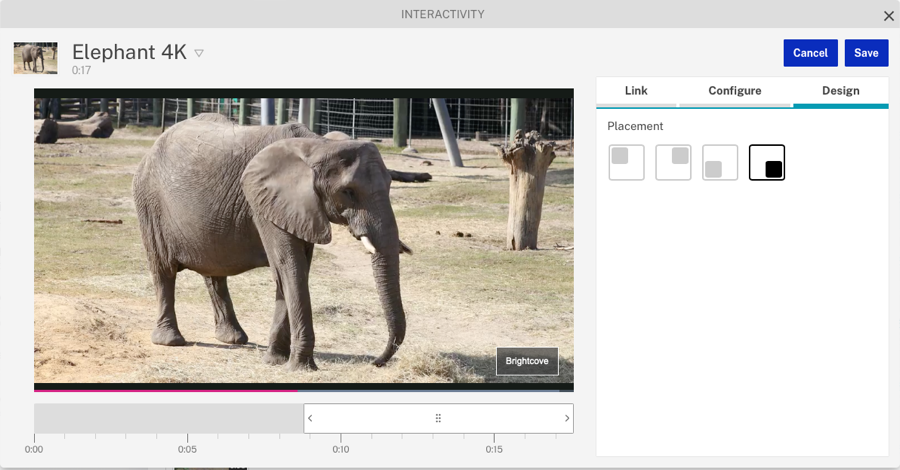
- Click the Design link. Set the link to appear in the bottom right of the player.
- Click . A list of all interactions configured for the video will be displayed.
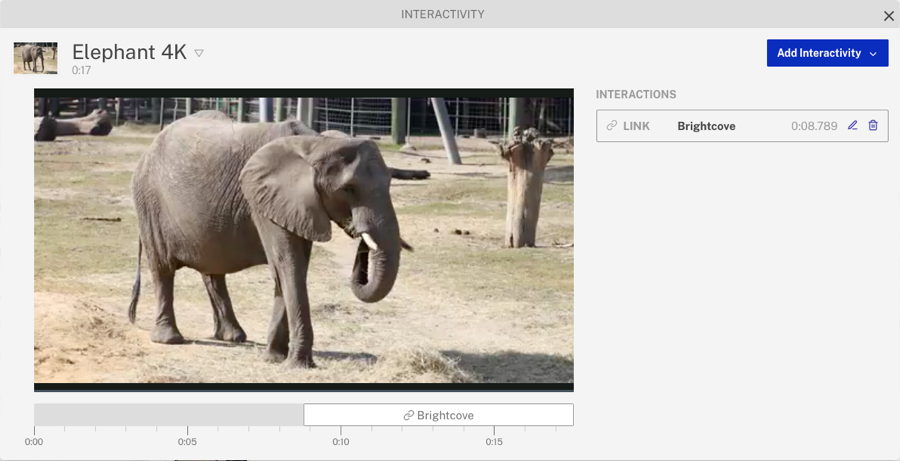
- Click the X in the dialog title to close the interactivity editor.
Videos with interactivity will display an icon in the Interactivity column indication the type(s) of interactions that have been configured.
Customizing the style
The style controls the fonts and colors that are used on the experience. For more information on customizing the style, see Customizing the Style of an Embed Experience.
To configure the style, follow these steps.
- Click Style in the left navigation.
- Locate the GLOBAL style. Click the Text Color circle and change the text color to Red. The text component that was added to the experience earlier should change to red.
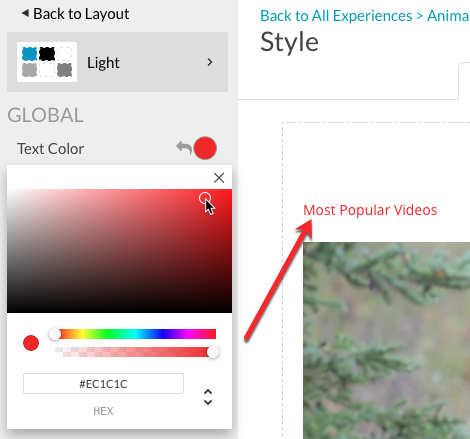
- Click the X to close the color picker.
- Locate the VIDEO TITLE style. Click the Text Color circle and change the text color to Blue. Click the X to close the color picker.
- Scroll the left navigation to the top and click on the Back to Layout link.
Configuring the experience settings
The experience settings control various aspects of the experience such as the player to use, social settings and other settings. For more information on customizing the settings, see Configuring the Settings for an Embed Experience.
To configure the experience settings, follow these steps.
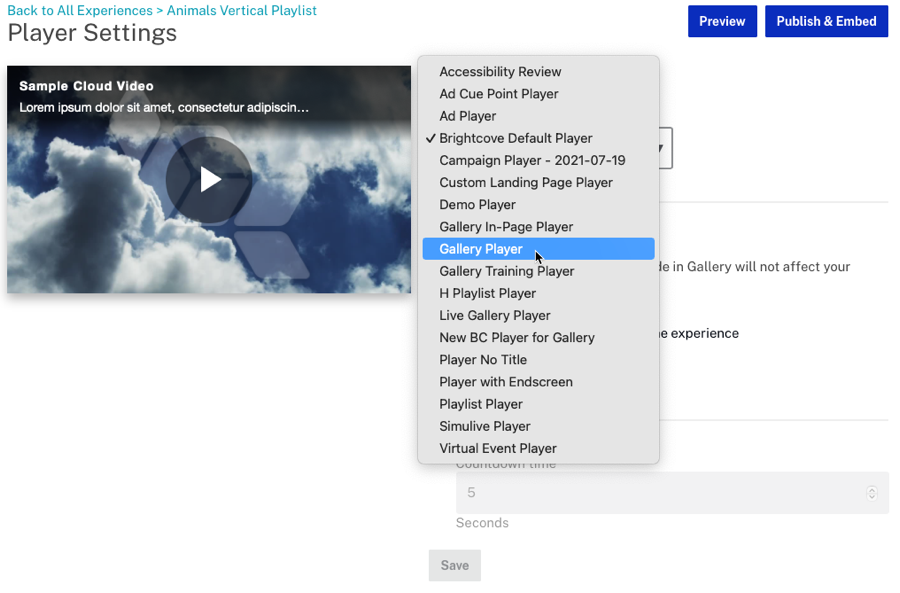
- Click Settings > Player in the left navigation.
- Use the Available Players dropdown list to select the Gallery Player you created earlier. This is the player that will be used on the Embed Experience.
- Check the Advance to next video automatically option.
- Click .
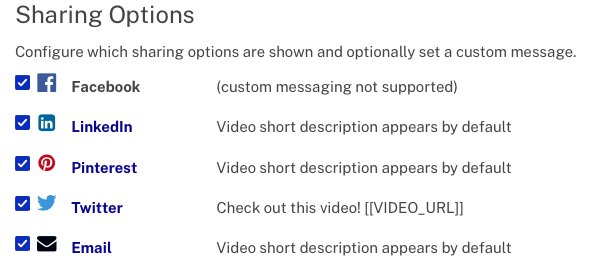
- Click Settings > Social in the left navigation.
- Select how the social sharing options should display.

- Select the social media sites videos can be shared to. Some sites also allow custom messages to be posted.
- Click .
Reviewing the experience details
The experience details is where the experience title and sizing is configured. For more information on customizing experience details, see Configuring the Details for an Embed Experience.
To configure the experience details, follow these steps.
- Click Overview in the left navigation.
- If needed, edit the experience title and description.
- Confirm the Layout Size is set to Responsive. When the layout size is set to responsive, it will resize to fit its container on the page.

- If any changes were made, click .
Previewing and publishing the Embed Experience
Previewing an Embed Experience lets you see how the experience is going display without having to view it inside the Gallery interface. Publishing the Embed Experience will generate the embed code needed to display the experience inside of a web page. For more information on previewing and publishing an Embed Experience, see Previewing and Publishing an Embed Experience.
- To preview an Embed Experience, edit the experience and then click Preview.
- A desktop preview will open in a new browser tab.
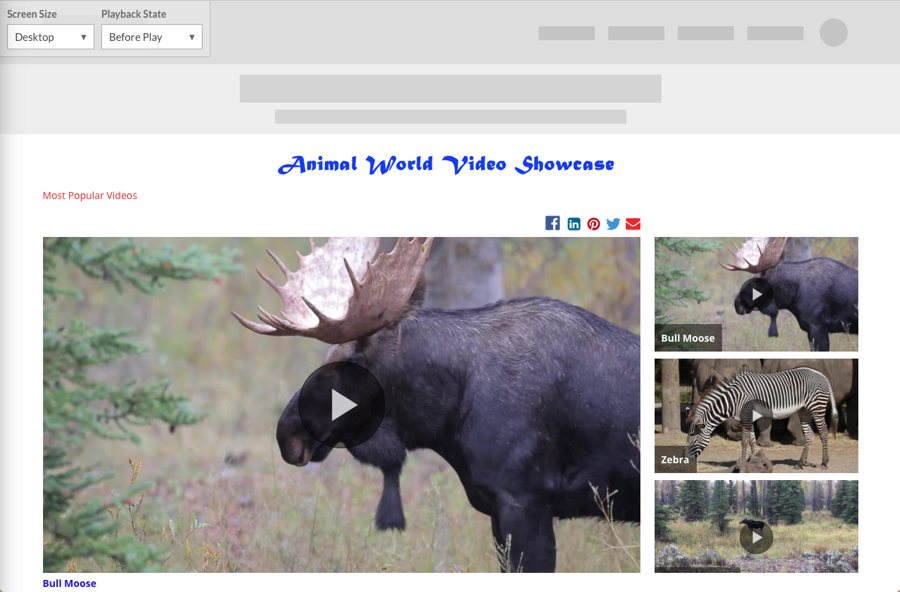
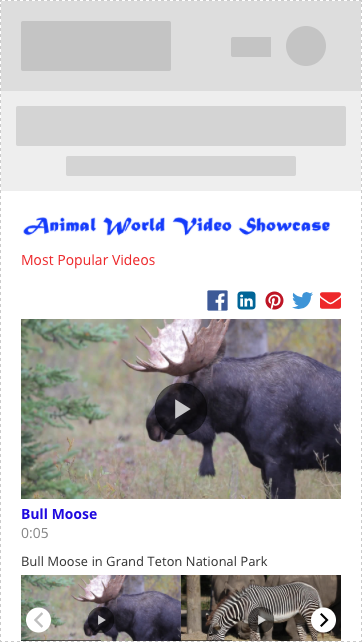
- The dropdown lists in the upper left corner can be used to preview the experience on different device types and also during different experience states.. A mobile preview is displayed below.
- To publish an Embed Experience, click .
- Click or .
- The publishing process will begin and when done, the Publishing Status will change to This experience is up to date. Note that it may take a few minutes for the experience to update.
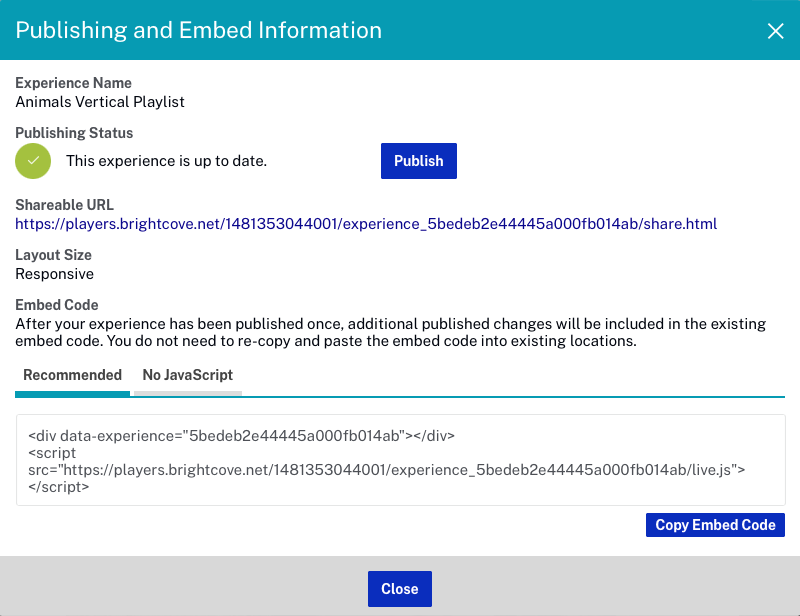
After the Embed Experience is published, the Shareable URL can be shared with others so they can preview the experience. The Embed Code can be used to embed the Embed Experience in an existing web page.