Securing a Website Experience with Auth0
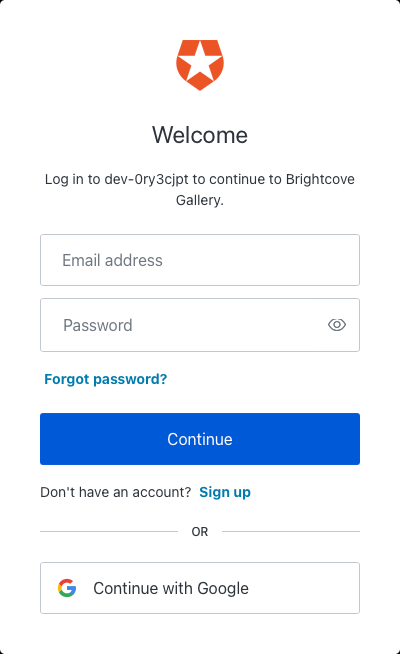
When an experience is secured using SSO, users will be required to authenticate before they can access the experience.
The steps in this topic assumed you have created a Auth0 trial account and have confirmed your account through email.
Creating an Access Control Profile
You need to create an Access Control Profile that will be used to secure any experiences you want to secure using SSO.
- Login to Video Cloud Studio.
- Open the Gallery module.
- Click the settings icon (
 ) on the home page.
 - In the left navigation click Access Control Profiles.
- Click .
- Give the profile a Name.
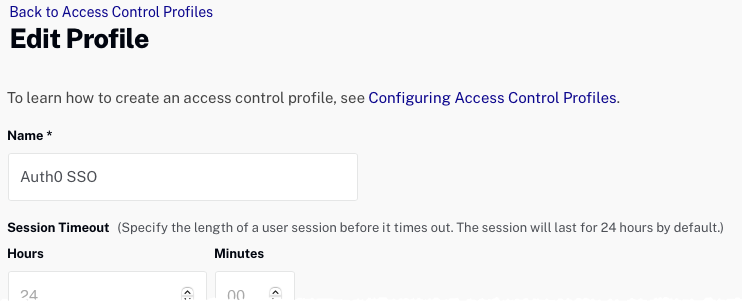
- Check the SSO option.
To complete the Access Control Profile, you need some values that will be provided as part of the Auth0 application creation process. After creating a new Auth0 application, we can finish creating this profile.
Creating an Application
Next, you need to create an application that will be secured using Auth0. As part of the application creation process, the signing certificate and SAML protocol URL will be used by the Access Control Profile created in the previous section.
- Log in to your Auth0 account.
- On the Getting Started page, in the left navigation, click Applications > Applications.
- On the Applications page, click + Create Application.
- Enter a Name for the application.
- Select an application type of Regular Web Applications.
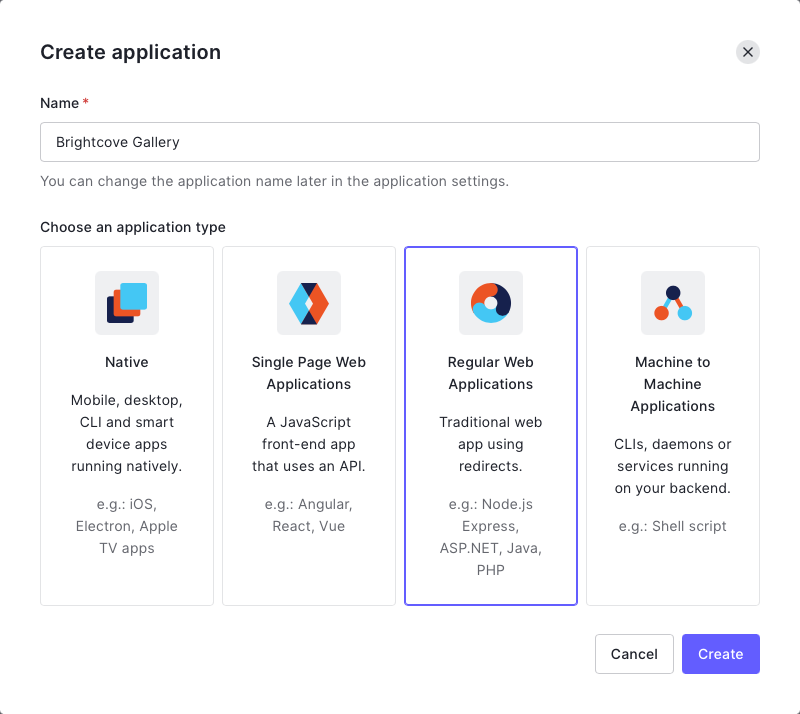
- Click Create.
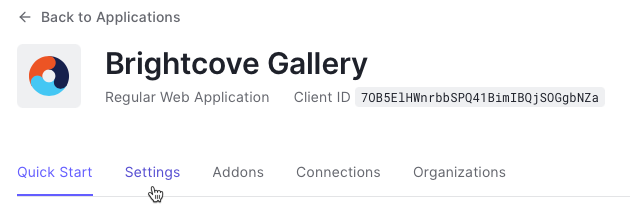
- Click the Settings link below the application name.
- Confirm that the Token Endpoint Authentication Method is set to Post.
- In the Allowed Callback URLs field, add the following URL:
https://auth.bcvp0rtal.com/login/callback - At the bottom of the page, expand the Advanced Settings.
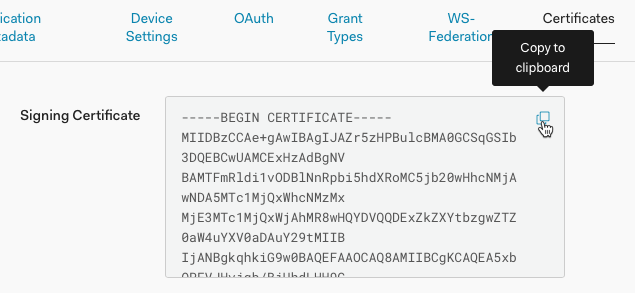
- Click the Certificates link.
- Copy the Signing Certificate to the clipboard.
- Return to Gallery and the Access Control Profile you created in the prior section.
- Paste the Signing Certificate into the X.509 Certificate field.
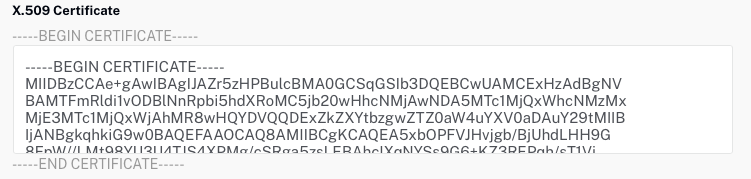
- Remove the ---BEGIN CERTIFICATE--- and ---END CERTIFICATE--- lines from the X.509 Certificate field.
- Return to Auth0.
- Click the Endpoints link.

- Locate the SAML Protocol URL and copy it to the clipboard.
- Return to Gallery and the Access Control Profile you created in the prior section.
- Paste the SAML Protocol URL into the SAML 2.0 Endpoint (HTTP) field.

- Check the Expose all attributes option at the bottom of the page.
- Click Save to save the Access Control Profile.
- Return to Auth0.
- At the top of the page below the application name, click the Addons link.
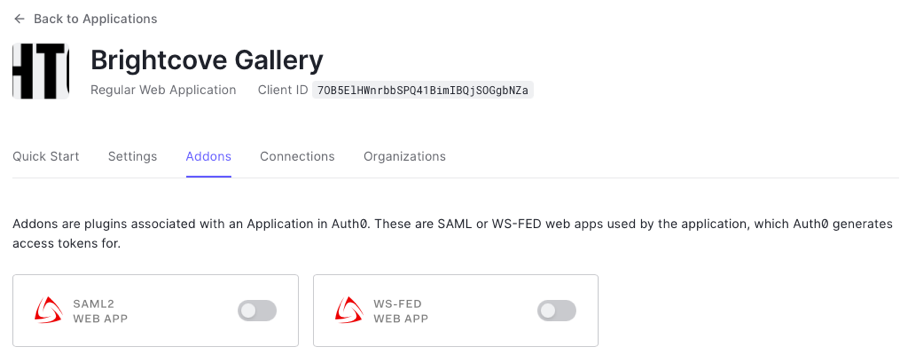
- Enable the SAML2 WEB APP option.
- Click the Settings tab.
- In the Application Callback URL field, add the following URL:
https://auth.bcvp0rtal.com/login/callback - Scroll to the bottom of the dialog and click Enable.
- Close the dialog.
Make sure you save the changes to the application settings.
Creating a User in Auth0
This topic uses a trial account of Auth0. By default, no users are created. You may need to add a user to complete the testing process.
- Return to Auth0.
- In the left navigation, click User Management > Users.
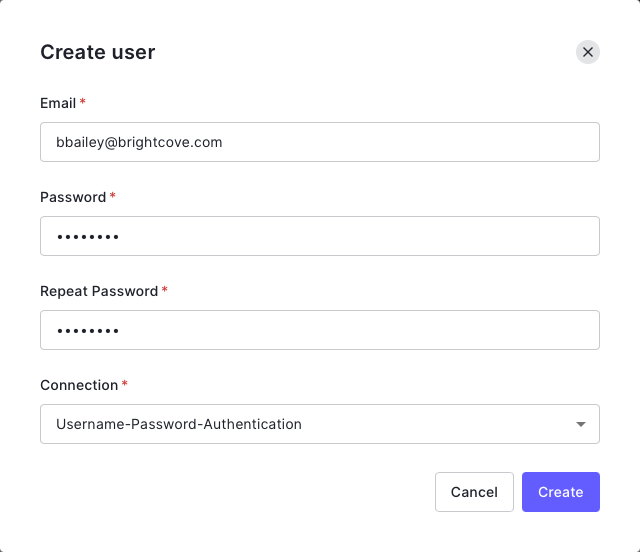
- Click + Create User.
- Enter the user info and click Create.
Assign the Access Control Profile to an experience
The last step is to assign the Access Control Profile that was created to the experience(s) you want to secure.
- Return to Gallery.
- Edit the experience you want to secure.
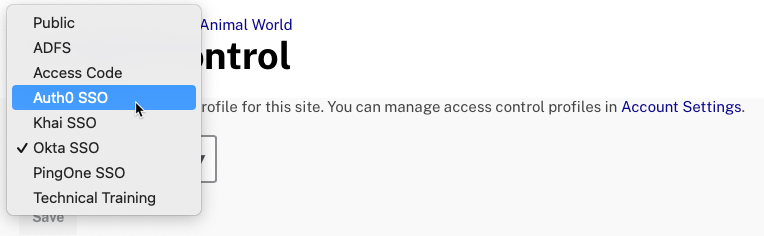
- In the left navigation, click Site Configuration > Access Control.
- Select the Access Control Profile that is associated with the Auth0 SSO configuration.
- Click .
- the experience.
When you access the experience, you should be prompted by Auth0 to login.