Creating a Landing Page Experience
The Landing Page template allows you to create an experience that displays a single video and can optionally capture viewer information. For example, you might create an email blast for a new product with a link to a landing page site. The site would display a product video and allow viewers to enter their information to receive more information.
The process to create and publish a Landing Page experience is similar to experiences that use the other templates. However, when creating a Landing Page experience, there are some layout options and site settings documented here that you might want to take advantage of.
Creating a Landing Page experience
To create a Landing Page experience, follow these steps.
- Open the Gallery module.
- Click the Experiences link at the top of the page.
- Click . A list of templates will display.
- Locate the Landing Page template and click .

The Gallery Site Editor will open.
Changing the landing page layout
The layout of the landing page can be configured to optionally display a call-to-action or a lead form. To change the layout of the landing page, follow these steps:
- In the Gallery Site Editor, click Pages in the left navigation.
- Click the settings icon (
 ) next to the Home page.
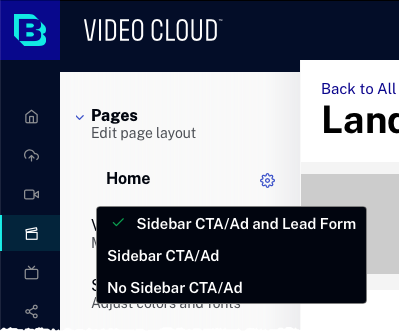
- Click on a layout option link:
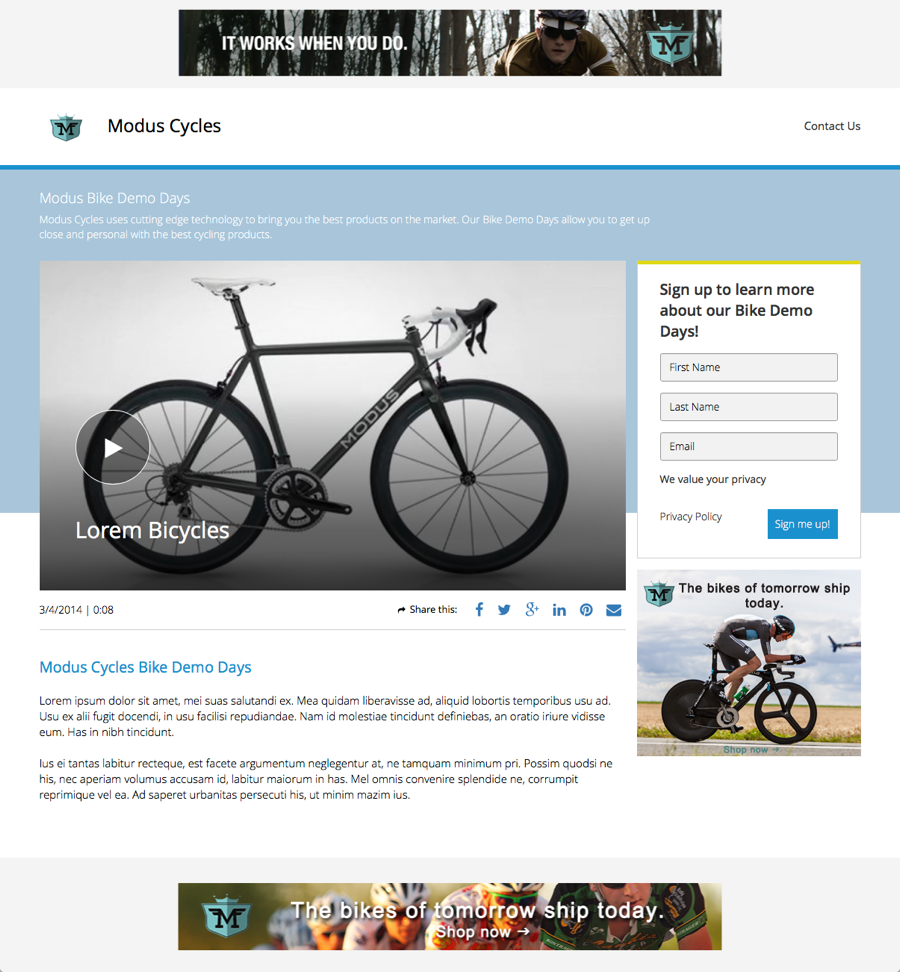
- Sidebar CTA/Ad and Lead Form - Displays a lead form and call-to-action in the right sidebar to the right of the player
- Sidebar CTA/Ad - Displays only a call-to-action in right sidebar to the right of the player
- No Sidebar CTA/Ad - Nothing is displayed in right sidebar to the right of the player
The preview in the Gallery Site Editor will update to display the layout. A single video, images, text, links and calls-to-action can be added as needed. For information on using the Gallery Site Editor to customize the site, see Using the Site Editor to Customize a Website Experience.
Using the single video selector
When using the landing page template, only a single video can be displayed. The landing page template uses the single video selector dialog vs. the collection editor used by the other templates. To select a video, follow these steps:
- Click Videos in the left navigation.

- Select a Video Source, both Video Cloud and YouTube are supported.
- Select the video criteria:
- Playlist - The video resides in a playlist. Select a playlist and then select the video.
- Search - Enter search criteria for the video. The Video ID, name and short and long description fields will be searched.
- Select a single video.
- Click to save the changes.
Configuring a lead form
In order to use a lead form, a Campaign-enabled player that is configured with a lead form must be selected.
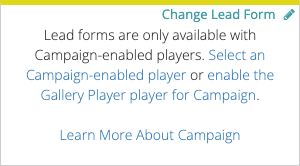
To select a Campaign-enabled player to use on the landing page, click Video and Playback > Player and Lead Form.
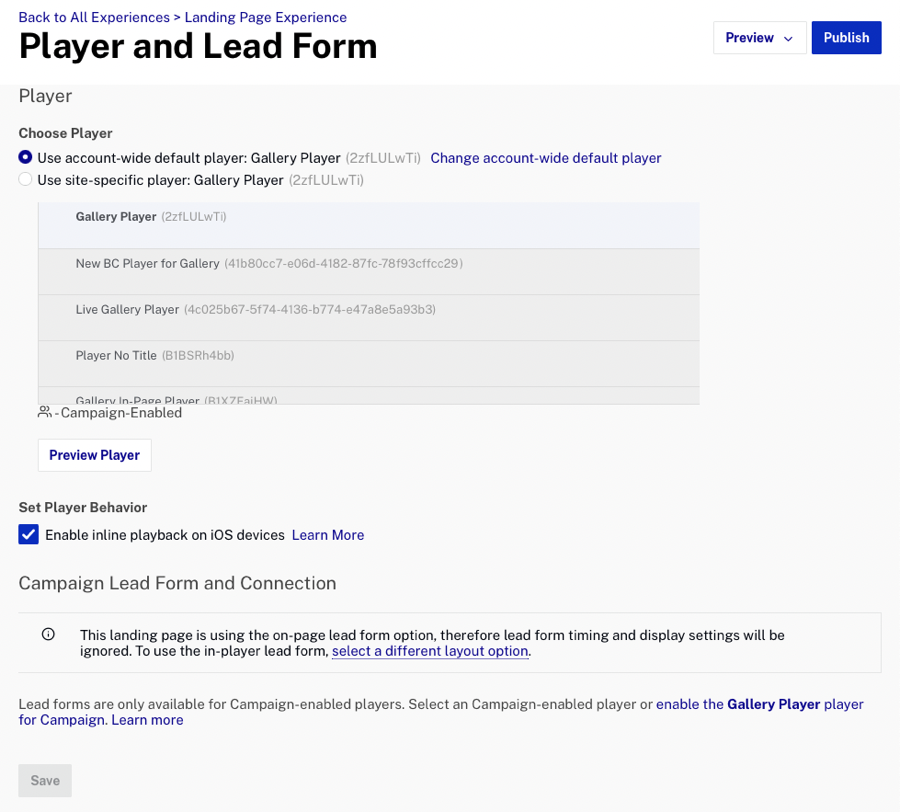
Campaign-enabled players are indicated with a Campaign icon (![]() ). After a Campaign-enabled player is selected, the dialog will update to display the lead form and Campaign connection information.
). After a Campaign-enabled player is selected, the dialog will update to display the lead form and Campaign connection information.
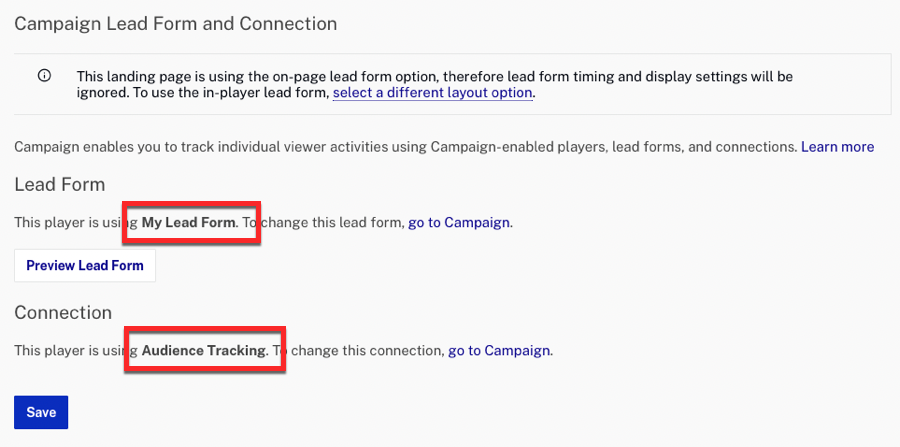
For information on creating lead forms and working with Campaign-enabled players, see Using a Lead Form with a Website Experience.
Configuring a subdomain
Custom domains and subdomains provide an easy way to publish the site on a unique URL. For example, you may create multiple landing pages and have them published to mycustomurl.com/bike_campaign and mycustomurl.com/shoes_campaign. For information on creating custom domains, see Configuring Custom Domains and SSL and Assigning a Custom Domain to a Website Experience.
Exporting lead data
All data captured in lead forms can be exported using the Campaign module. For information, see Exporting Gallery Lead Data.