Previewing and Publishing an Embed Experience
An Embed Experience can be previewed at any time during design to see how it will appear on different device types. The publishing dialog provides the ability to publish changes made to an experience and also generates the embed code that you will add to your web page.
Previewing an Embed Experience
Previewing an Embed Experience lets you see how the experience is going display without having to view it inside the Gallery interface. To preview an Embed Experience, follow these steps.
- Edit the experience.
- Click . A desktop preview will open in a new browser tab.
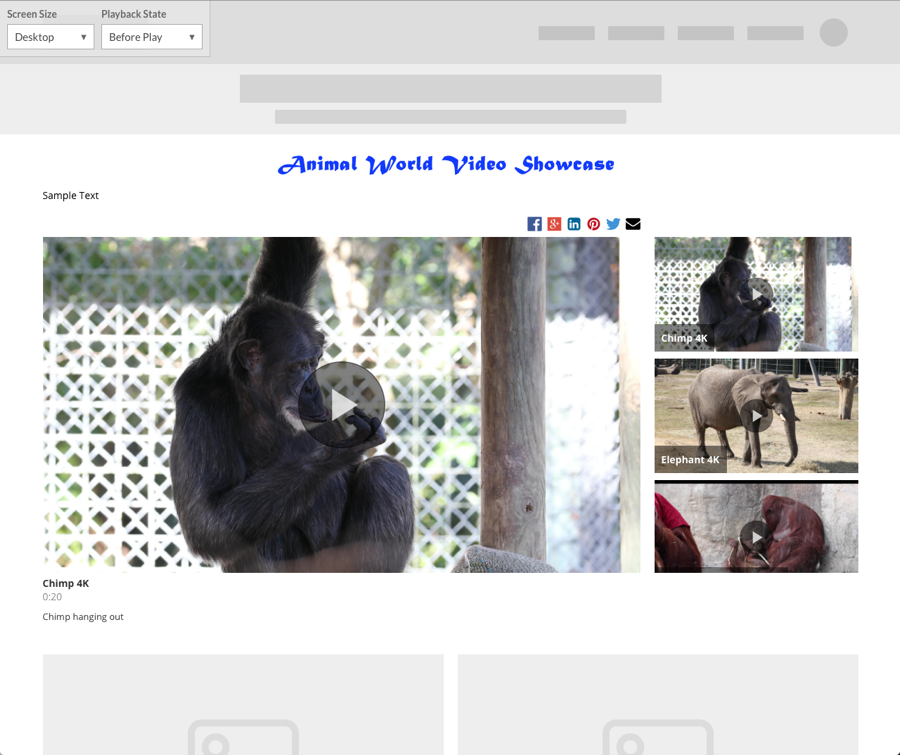
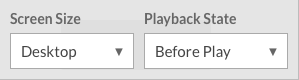
- Use the dropdown lists in the upper left corner to preview the experience on different device types and also during different experience states.
Publishing an Embed Experience
Whenever changes are made to an Embed Experience, the changes must published so they appear on your site. If you make changes to an experience and don't publish them, the changes will not appear on the production site.
To publish an Embed Experience, follow these steps:
- Edit the experience.
- Click at the top of the page. The publishing dialog will open.
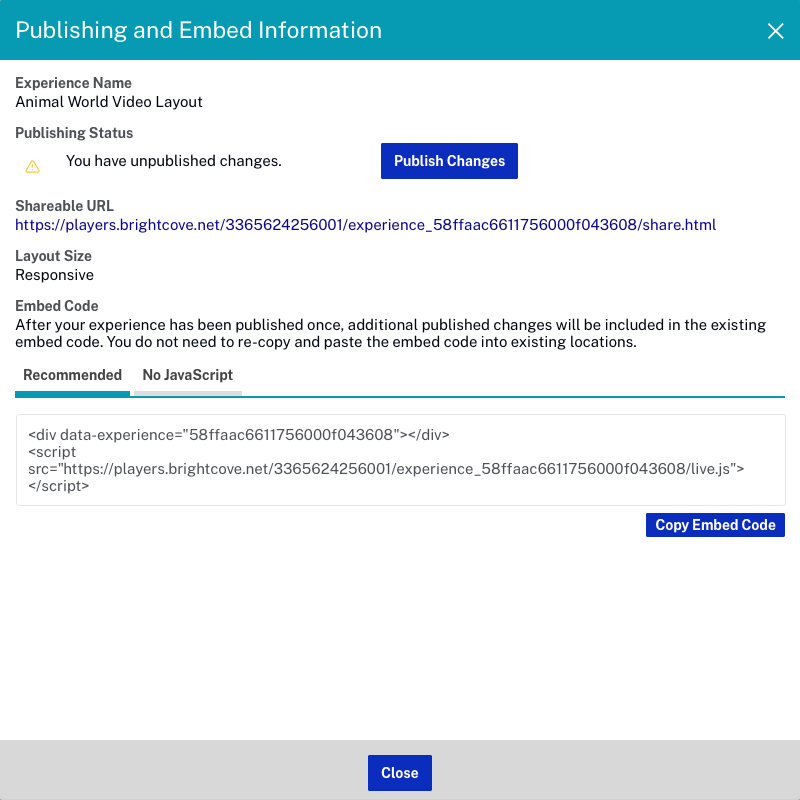
- Click Publish Changes. The Publishing Status will change to "Publishing in progress…".
- When the publish has completed, check the Publishing Status. The status should be This experience is up to date. Note that it may take a few minutes for the experience to update.
As changes are made to the experience, you must republish the experience.
Copying the embed code
The Embed Code is required to display the Embed Experience on your site. The first time the experience is published, the Embed Code can be copied and inserted into your site. As changes to the experience are made and published, those changes will appear in your site.
There are two types of Embed Code:
- Recommended - Recommended in most cases. The Embed Experience will be displayed inside of a
<div>tag on your page. Recommended is required to allow the experience to resize itself and behave in a responsive way on the page. - No JavaScript - The Embed Experience will be displayed inside of an
<iframe>tag on your page. Typically this would be done when you are embedding the experience into a CMS or other platform that doesn't allow<script>embeds. There is a high risk that the Embed Experience won't always fit properly inside the No JavaScript embed and the experience will have scrollbars or extra blank space. Some features will not work correctly using this option and we STRONGLY encourage users to embed using the Recommended (JavaScript) embed whenever possible. For example, when using this option, analytics will not report the right URL and lightbox playback will not be able to go fullscreen, it will be limited to the size of the iFrame. Any changes in height of the experience across before/during/after playback states will result in additional whitespace at the bottom of the experience or a scrolling experience.
To copy the embed code, click Copy Embed Code.
For an Embed Experience to scale correctly on mobile devices, it is recommended to add a viewport meta tag to the surrounding site. For example:
<meta name="viewport" content="width=device-width, initial-scale=1.0">
For information on the viewport tag, see this document.
Using dynamic video overrides
There may be times when you want to change the videos in an Embed Experience. For example, maybe the videos in an experience need to change based upon the area of the site where the experience is embedded. Instead of creating new Embed Experiences, each with a different set of videos, it is possible to create one experience and then modify the embed code to dynamically assign the appropriate videos to an experience. For information on using dynamic video overrides, see Using Dynamic Video Overrides in an Embed Experience.