People Widget on the Immersion Gallery template
The people widget lets you highlight people on your page. This is very helpful when you have an event and want to showcase the presenters.
Create a Widget
First, you must create an Immersion Experience to use a People Widget. Follow these steps:
- In the left navigation, click Gallery.

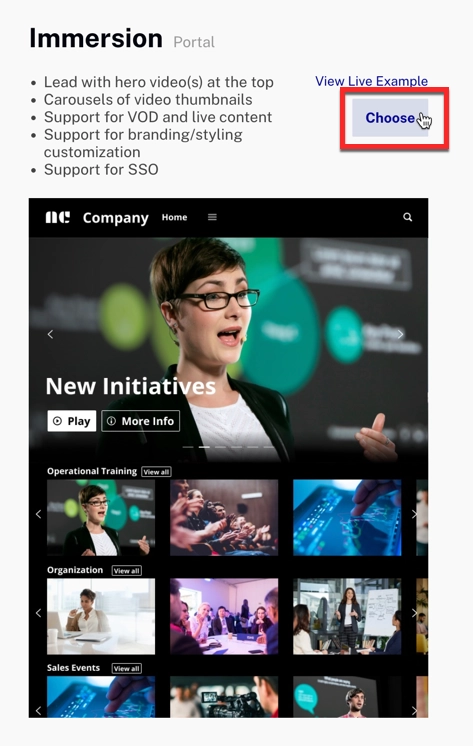
gallery module - Choose Immersion.

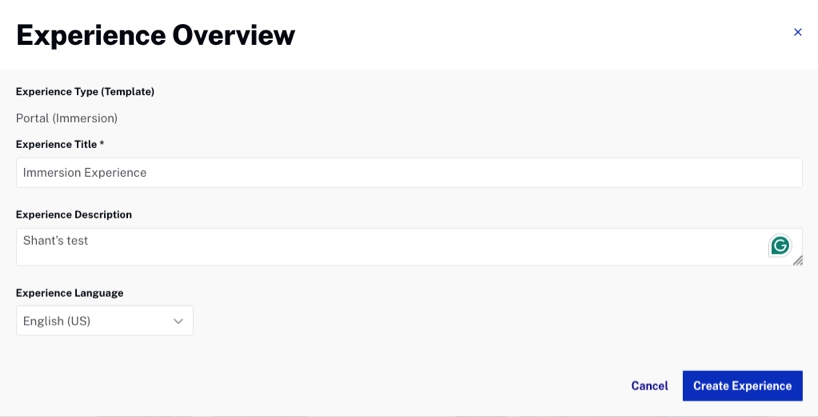
immersion - In Experience Overview, customize your experience. Add a description and select the experience language. Then, click Create Experience. To learn more about Experiences, see Overview: Creating, Editing and Publishing Portal Experiences.

experience overview - Click the Add a Section icon on the right side of the interface.
- Select the People widget from the widgets section to add it.
- Once the People widget has been added, hover over it and click Select people.
- Click Add People to add a new person.
- Select from the people you have already created or click New Person + to add a new person. To learn how to create new people profiles, see Creating an Event Speakers File.
If you already have added people:
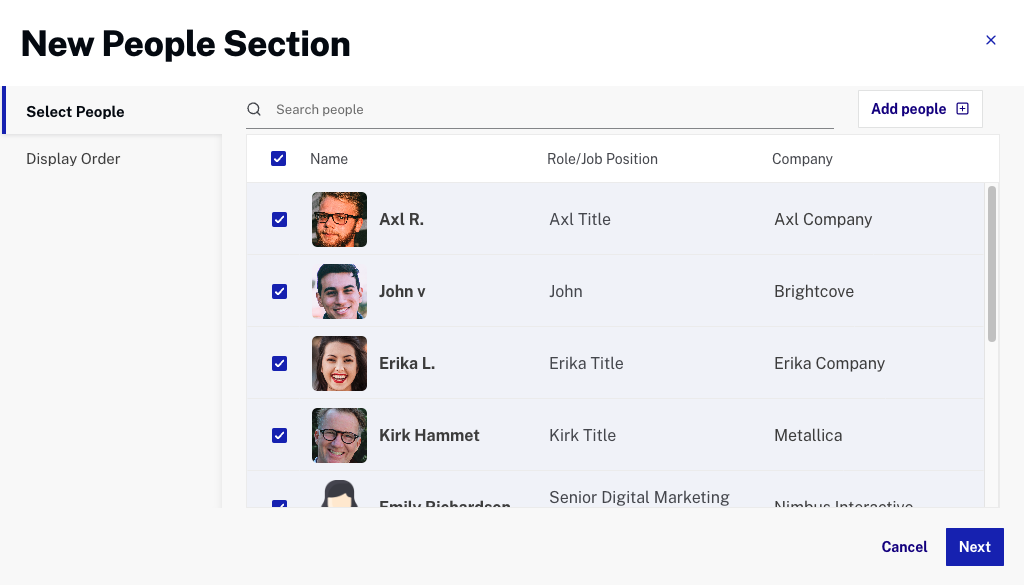
- Back on the Custom Page, click Select People again in the People Section to reopen the New People Section modal.
- The modal has two tabs:
- Select People: This tab displays those previously added to the Agenda Module.
- Display Order: This tab is initially disabled. In this tab, the selected people will be displayed, and we will be able to reorder them.

select people modal
Using the Select People Tab
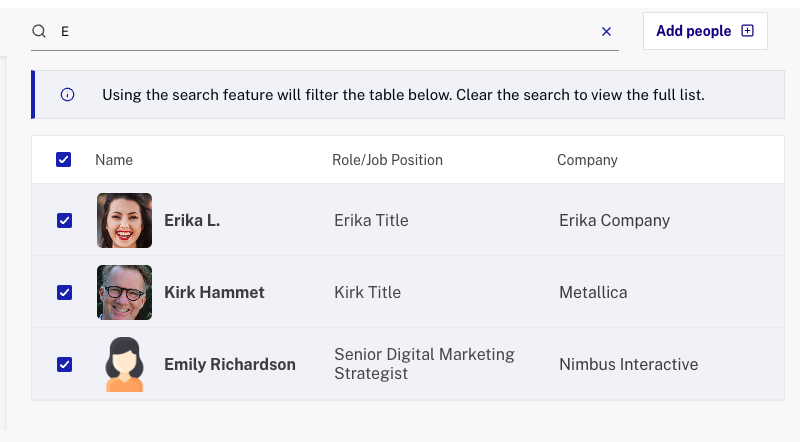
- The tab includes a Search Input to filter people by name. If we type in the search input field, an alert shows up with the following message:

search input - An button allows users to add more people by redirecting them back to the Agenda Module if necessary.
- The list of people includes columns for Name, Role/Job Position, and Company.
- At the top of the list, a master checkbox allows users to select or deselect all people simultaneously, while individual checkboxes enable specific person selections.
- The button is initially disabled. When at least one person is selected, the button becomes enabled, allowing users to proceed to the next tab.
Accessing the Display Order Tab
- After clicking the button, users are directed to the Display Order tab, which only displays the people selected in the previous step.
- This tab replaces checkboxes with a drag icon next to each person. Hovering over this icon changes the cursor to a "grabbing" hand, indicating that items can be dragged.

display order
Reordering People with Drag-and-Drop
- Users can rearrange people by dragging them within the list. The Order column shows numbers starting from 1, reflecting each person's position.
- When a person is moved to a new position (e.g., moving #3 to #1), the order numbers automatically update to reflect the new sequence.
Saving the Custom Order
- Once the desired order is set, clicking finalizes it and stores it directly within the People Custom Section.

people custom order
Editing People
To edit the people displayed in your widget, follow these steps:
- Hover over the People widget and click the gear icon to open the widget settings.
- Click the pencil icon next to the person you want to edit. This will redirect you to the People management page.
- In the People management page, click the three-dot menu next to the person's name and select Edit.
- Make your changes to the person's information.
- Click Save.
Deleting the People Widget
To delete the People widget follow these steps:
- Hover over the People widget and click the gear icon, then click Delete.
- Confirm the deletion when prompted.
Deleting One Person
Let's suppose that one or more people cannot attend an event, and we want to remove it without removing the whole widget. To do so, follow these steps:
- Hover over the People widget and click the gear icon.

people widget - Click the pencil icon next to the person you want to remove. This will take you to the People management page. Click the three-dot menu next to the person's name and select Delete.
- Click Delete.

delete person
Removing a person from the component without deleting them from the database
The following video shows removing a person without deleting them from the database.
