Configuring the Settings for an Embed Experience
The settings control various aspects of an Embed Experience. The following settings are available:
Configuring player settings
The player settings control the player that is used and the player behavior for the experience. To configure the player settings, edit the experience and then Click Settings > Player in the left navigation.
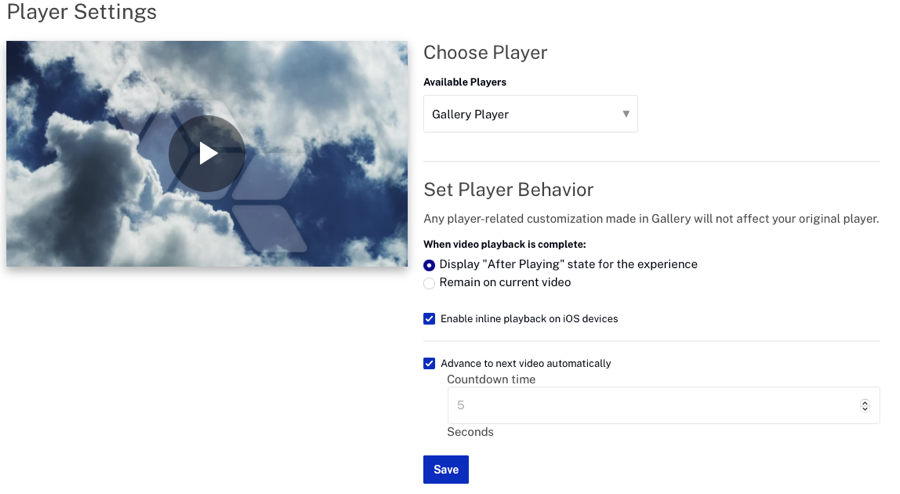
Selecting a player
To select a player to use for the Embed Experience, select a player from the Available Players dropdown list. The list will display all the players in your Video Cloud account.
After you select a player, the player preview will display a preview of the selected player.
Setting player behavior
Player settings can be configured to customize the player behavior. The following settings are available:
- When video playback is complete determines what happens when a video finishes playing:
- Display "After Playing" state for the experience - When selected, the experience will enter the AFTER PLAY state when a video completes.
- Remain on current video - When selected, the experience will stay in the PLAYING state when a video completes. Select this option to display the custom endscreen (configured in the Players module) that is configured for the player. Components displayed during the PLAYING state will also remain visible. This option has the side effect of effectively removing the AFTER PLAY state from the experience.
- Enable inline playback on iOS devices - If checked, enables inline playback on iOS devices when using Brightcove Player version 5.10.5 or newer.
- Advance to next video automatically - If checked, the next video in the experience will be played when the current video finishes playing. This setting also determines whether to display a countdown timer in the AFTER PLAY state. If it is enabled, there will be a timer. When the timer reaches zero, the experience will transition to the PLAYING state of the next video.
Working with IP restricted accounts
IP restricted accounts outside of North America require modification of the Playback API base_url in the player. Embed Experiences will copy this base_url from the player when the experience is created and when a player is selected for the experience. If the base_url on a player for an existing experience is changed, Gallery will not automatically update this value since we don't know that it changed. As a workaround, publishers should follow these steps as a workaround:
- Click the experience.
- Click Settings > Player in the left navigation.
- Select a different player than the one that's currently selected.
- Re-select the initial player.
- Save and then publish the experience.
This will update the base_url for the experience to match that of the initial player.
When done, click Save to save the changes.
Working with domain restricted Players
Domain restricted players require modification of the Policy Key in the player. Embed Experiences will copy this policy_key from the player when the experience is created and when a player is selected for the experience. If the policy_key on a player for an existing experience is changed, Gallery will not automatically update this value since we don't know that it changed. As a workaround, publishers should follow these steps as a workaround if they update their list of approved domains:
- Click the experience.
- Click Settings > Player in the left navigation.
- Select a different player than the one that's currently selected.
- Re-select the initial player.
- Save and then publish the experience.
This will update the policy_key for the experience to match that of the initial player.
When done, click Save to save the changes.
Configuring video settings
The video settings control some of the video display options and control whether the video can be downloaded. These settings only apply when the video is in the PLAYING state. To configure the video settings, follow these steps:
- Click the experience.
- Click Video > Player in the left navigation.
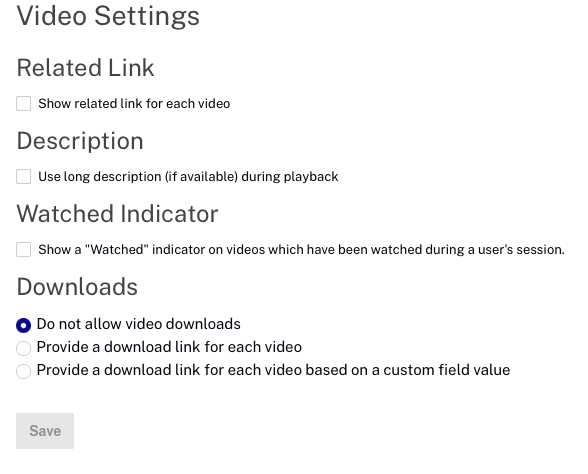
Related Link
If checked, the related link for the video will appear with the video info. The related link is configured as part of the video properties in the Media module.
Description
If checked, the long description for the video will appear instead of the short description with the video info. The short and long descriptions are configured as part of the video properties in the Media module.
Watched Indicator
If checked, a watched indicator ( ) will appear on videos which have been watched during a user's session.
Downloads
Embed Experiences can be configured so viewers can download videos. The download link allows the viewer to download the highest quality rendition. Select a download option:
- Do not allow video downloads
- Provide a download link for each video
- Provide a download link for each video based upon a custom field value - Define a custom field and then set that field to true for any video that can be downloaded. For complete steps on configuring a download link for each video, see Configuring Video Downloads for an Embed Experience.
When done, click Save to save the changes.
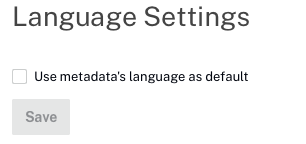
Configuring language settings
Currently the language settings are not supported when creating an Embed Experience.
Configuring social settings
The social settings control the social sharing options that are available when videos are playing. Social sharing icons appear above the player when the experience is in the PLAYING state. When a video is shared to a social media site, a link or image will appear directing the viewer back to the experience.
Gallery uses a social media metadata proxy service. This service is used whenever a video or event is shared out from an Embed Experience, and is part of the URL which is shared. It will redirect viewers to the page on which the Embed Experience is embedded, however, crawlers will see metadata about the video/event instead. In this way, social media crawlers will get information about the video/event which is being shared and can present more relevant information to the end-user on the social media site, while end-users are still able to access the original page.
To configure the social settings, edit the experience and then click Settings > Social in the left navigation.
Display
The Display setting determines how the social icons are displayed. When the Share option (![]() ) is selected, the sharing icons will slide in from the right side of the player.
) is selected, the sharing icons will slide in from the right side of the player.
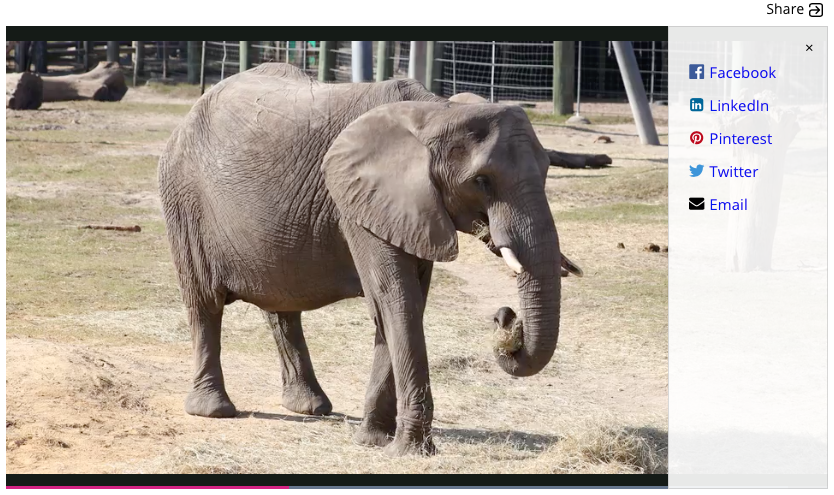
When the social icons option (![]() ) is selected, the social icons will appear above the player.
) is selected, the social icons will appear above the player.
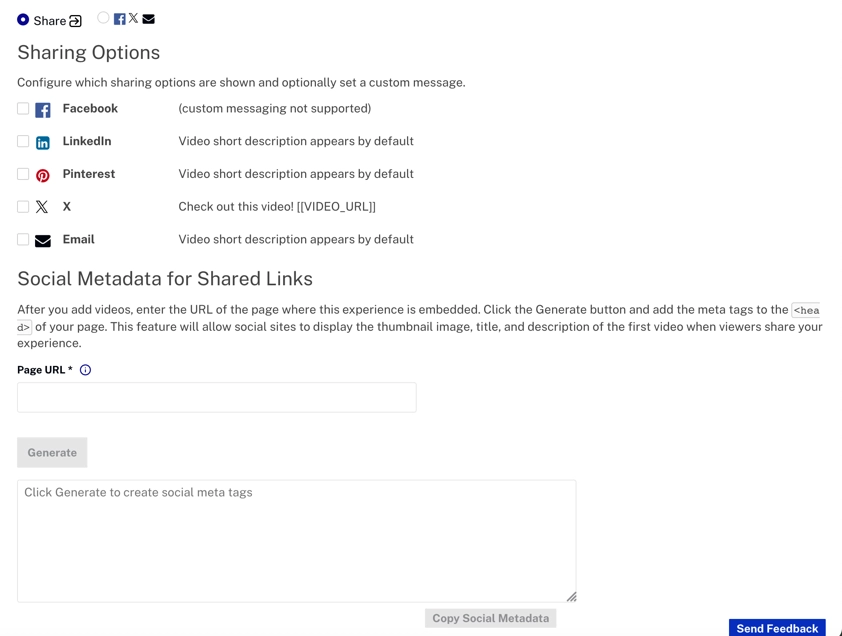
Sharing Options
Select the social sharing options to display. Some platforms offer the ability to enter a custom message. Click on the social platform name to enter a custom message. Click on a link to use the video URL, name or short description values in the message.
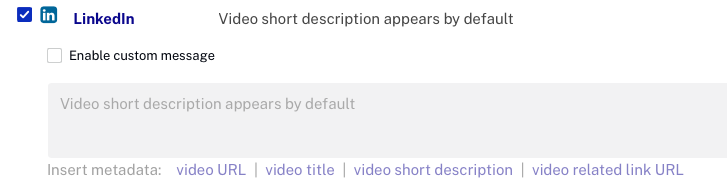
Click on the social platform name again to hide the custom message settings.
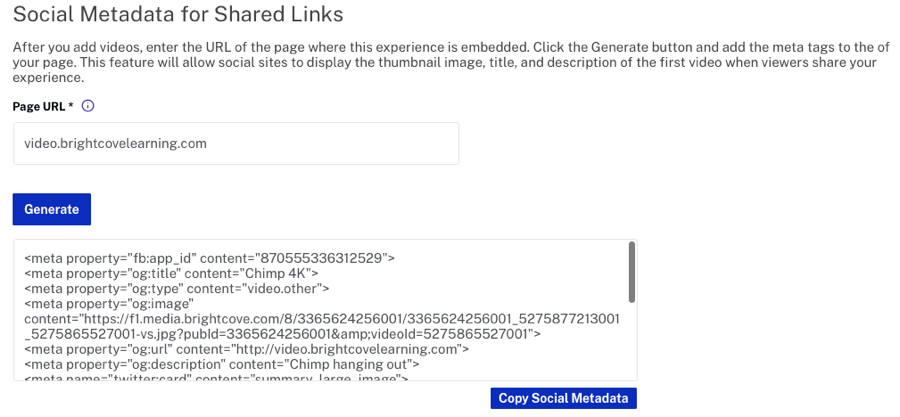
Social Metadata for Shared Links
Enter the Page URL of the page where the experience is embedded and then click . This will allow social sites to display the thumbnail image, title, and description of the first video when viewers share your experience.
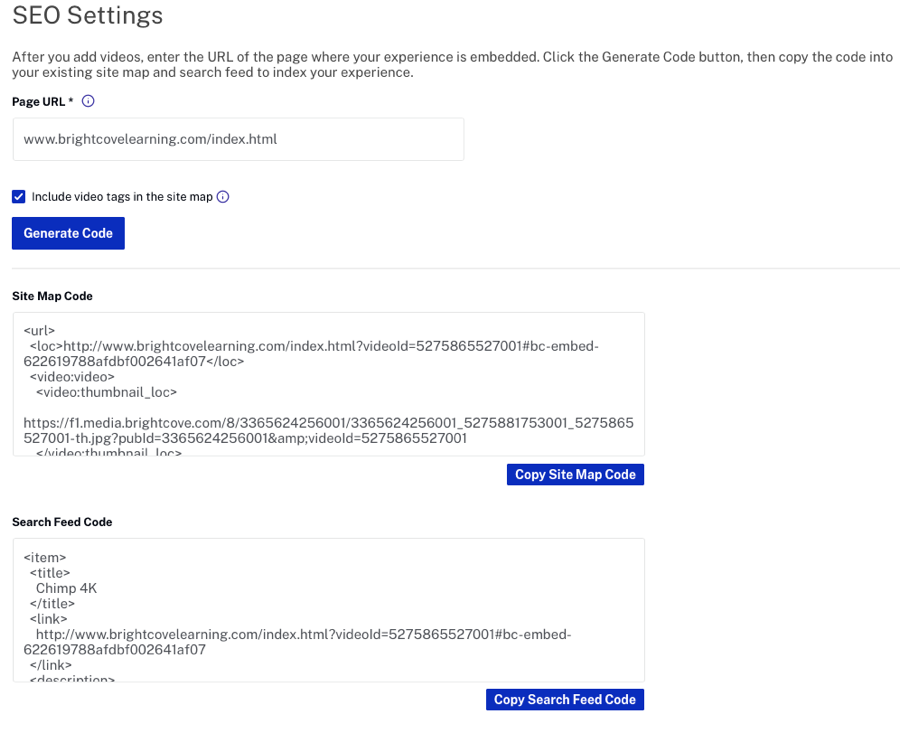
Accessing SEO settings
The SEO settings allow you to generate a site map and search feed for the Embed Experience. To generate a site map and/or search feed, follow these steps:
- Edit the experience.
- Click Settings > SEO in the left navigation.
- Enter the Page URL. This is the URL of the site where the Embed Experience will be published.
- Check whether video tags should be included.
- Click .
The site map code should be copied into your existing site map to index the Embed Experience information.
Configuring tracking
The tracking setting can be used to send tracking data to Google Analytics. To configure the tracking setting, edit the experience and then click Settings > Tracking in the left navigation.
By providing a Google Analytics Tracking ID in the Tracking page, events occurring on the experience will be submitted to a Google Analytics account. Each event has a category in the form of Brightcove Experience {name} - {state} where {name} is the name of the experience, and {state} is the current playback state of the component (before, during, after). Each event may also have a relevant label, which is usually the ID of the video on which the event occurs. The following events are currently tracked (more will be added in the future as needed):
| Action | Description |
|---|---|
| Featured Video Clicked | The featured video was clicked |
| Video Clicked | A video was clicked |
| Watched Video Clicked | The watched video was clicked |
| Next Video Clicked | The next video was clicked |
| Replay Clicked | The “Replay” button was clicked |
| Auto-Advance Stop | The next video countdown was stopped / canceled |
| Auto-Advance Countdown Elapsed, Playing Next Video | The next video countdown timer elapsed, so the next video is being played |
| Back Button Clicked | The “Back” button was clicked |
| Share Panel Opened | The Share panel was opened |
| Share Panel Closed | The Share panel was closed |
| Share to {platform} Clicked | The share link to the specified platform (Facebook, Twitter, etc.) was clicked |
When done, click Save to save the changes.
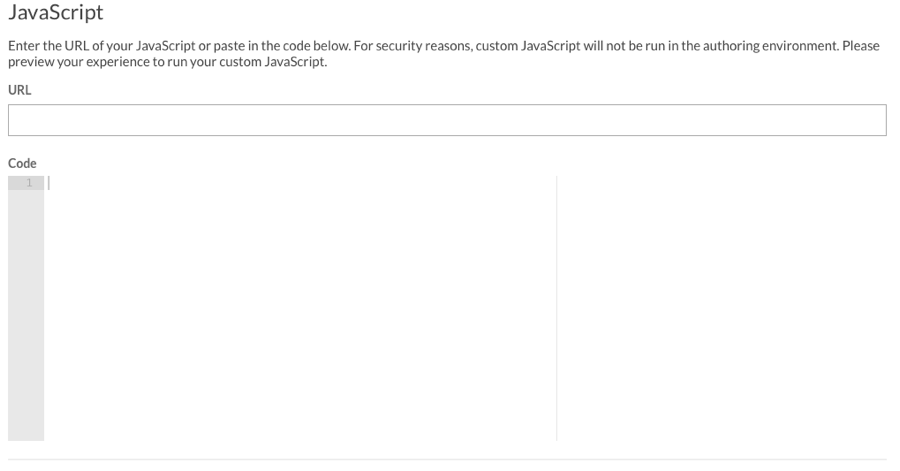
Configuring advanced settings
The advanced settings can be used to enter custom JavaScript or to configure a video link query parameter. To configure the custom settings, edit the experience and then click Settings > Advanced in the left navigation.
JavaScript
Enter the URL of a custom JavaScript file or paste in your custom JavaScript.
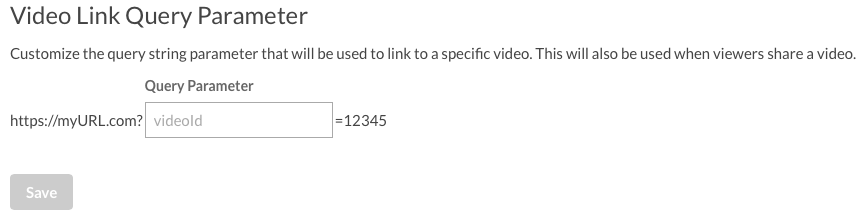
Video Link Query Parameter
The Video Link Query Parameter can be used to specify the query string parameter that will be used when deep linking to a video. Deep linking is typically used for search/SEO and when sharing videos to social media platforms. By default, Gallery will use videoID.