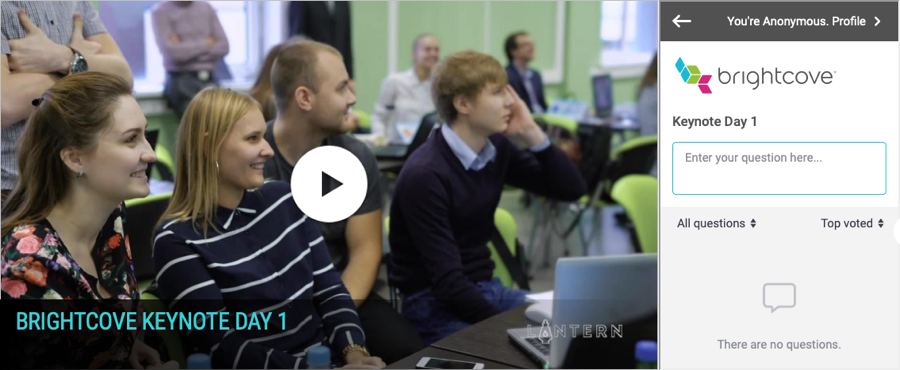
Pigeonhole can be used to easily add event based interactivity (live Q&A, polls, surveys, etc.) to one or more videos in a Virtual Event experience. Typically, a new Pigeonhole is created for the duration of the live event and then sessions can be created for each video you want to add Pigeonhole functionality to. To add interactivity to videos, iframe embed code is associated with each video using a Video Cloud custom field. The embed code will cause the Pigeonhole pod to display next to the video player for chosen videos.
Creating a new Pigeonhole event and sessions
You should create a new Pigeonhole for your live event and then add sessions for each video that will have Pigeonhole functionality added to it.
- Login to your Pigeonhole account.
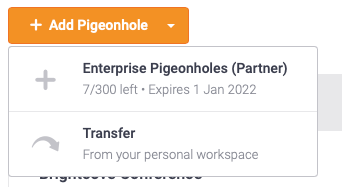
- Click + Add Pigeonhole and click your account to use.
- Enter an Event name and Passcode.
- Enter Start and End dates for the event. These dates control how long the Pigeonhole will be active.
- Select a Timezone and Custom Branding option (if applicable).
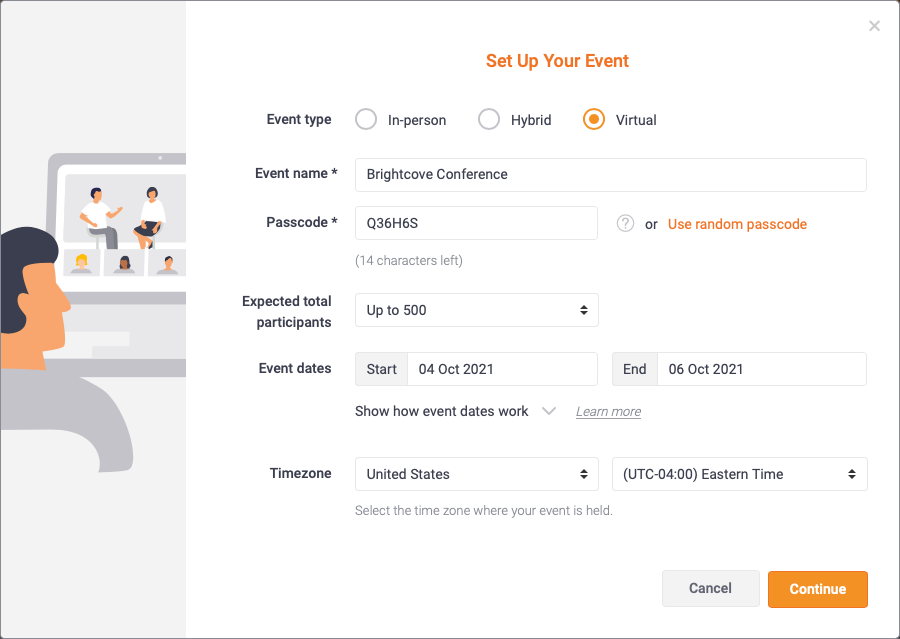
- Click Continue.
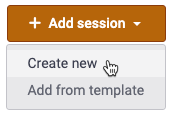
- Now that the event is created the Agenda item will be selected in the left navigation. Click Add session and click Create new.
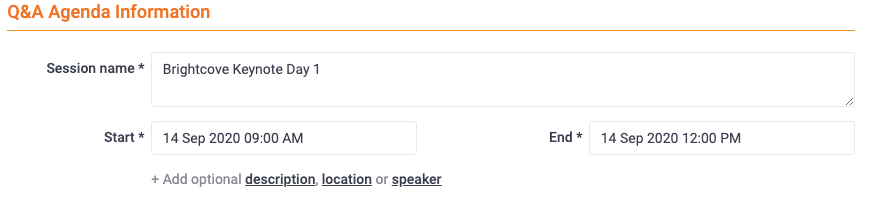
- Select a Session Type of Q&A (other session types can also be used).
- Enter a Session name.
- Enter Start and End dates and times.
- Configure the Q&A Settings as appropriate.
- Click Add Q&A and confirm the session was created.
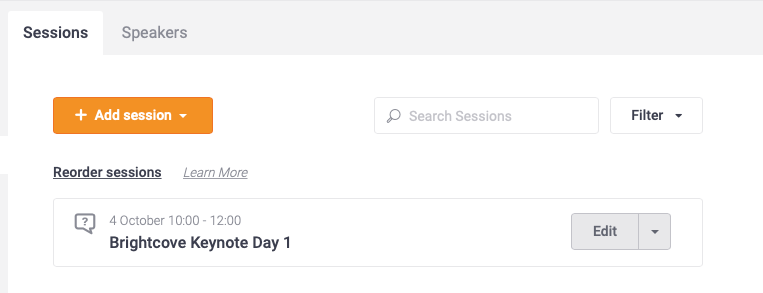
- Create additional sessions as needed.
Generating the Pigeonhole embed code
In order for a Pigeonhole to display next to a video, iframe embed code will be added to video using a Video Cloud custom field. The format of the code will be:
<iframe src="Pigeonhole URL"></iframe>
To get the value for the pigeonhole URL, follow these steps.
- In Pigeonhole, click Run your event in the left navigation.
- Click the link in the Invite your attendees section.
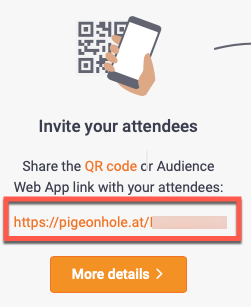
- Confirm that a new browser tab with a list of all sessions opens.
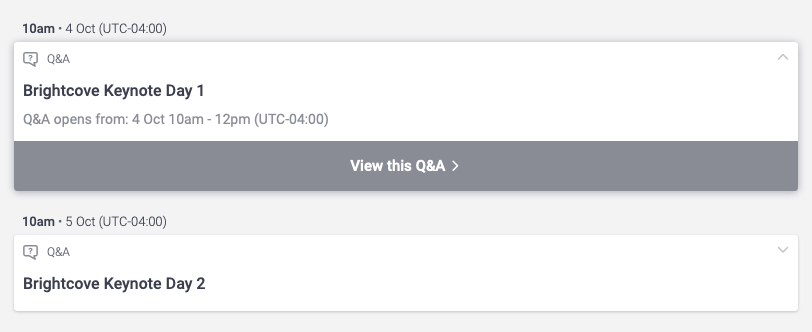
- Click the enter link for the appropriate session, for example, Enter this Q&A. Note that the link will change based upon the session type.
- Confirm that the Pigeonhole opens in a new browser tab. The Pigeonhole URL is displayed in the browser address bar.
The iframe tag with the Pigeonhole URL will be added to the appropriate video.
Configuring event settings
Settings for the Pigeonhole event must also be configured so the SSO information can be used to create a user profile.
- In the left navigation, click More settings.
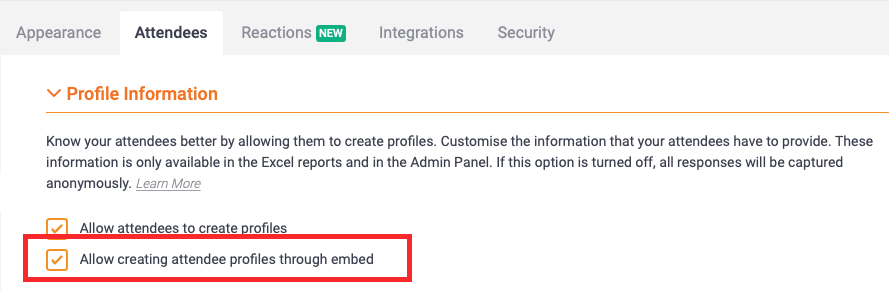
- Click the Attendees tab.
- Check the Allow creating attendee profiles through embed option.
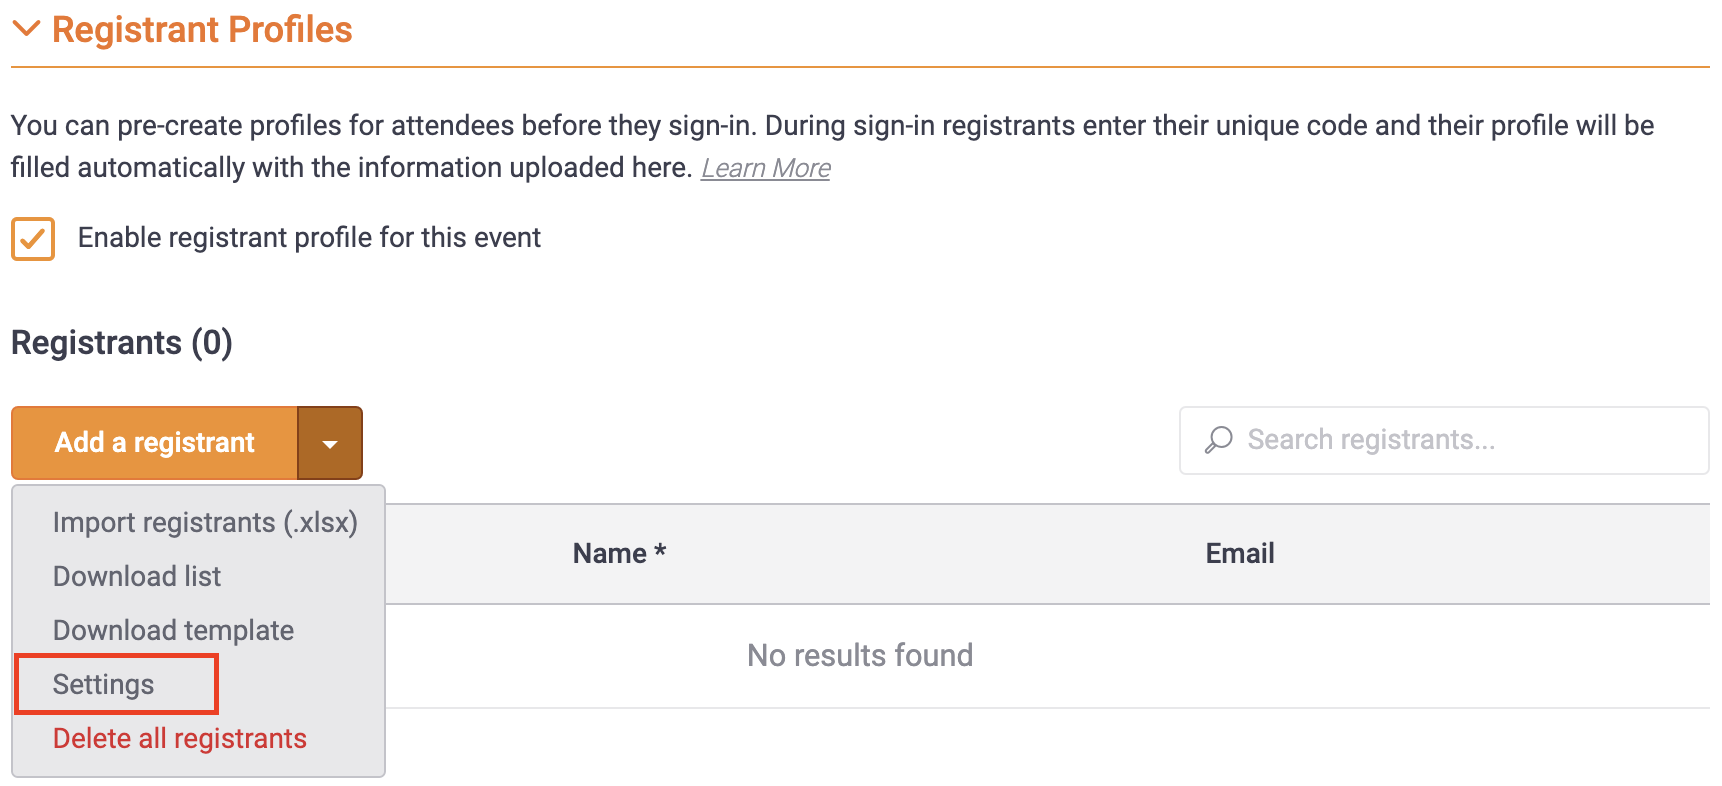
- Scroll down to the Registrant Profiles section on the page.
- Check the Enable registrant profile for this event option.

- Select Settings.
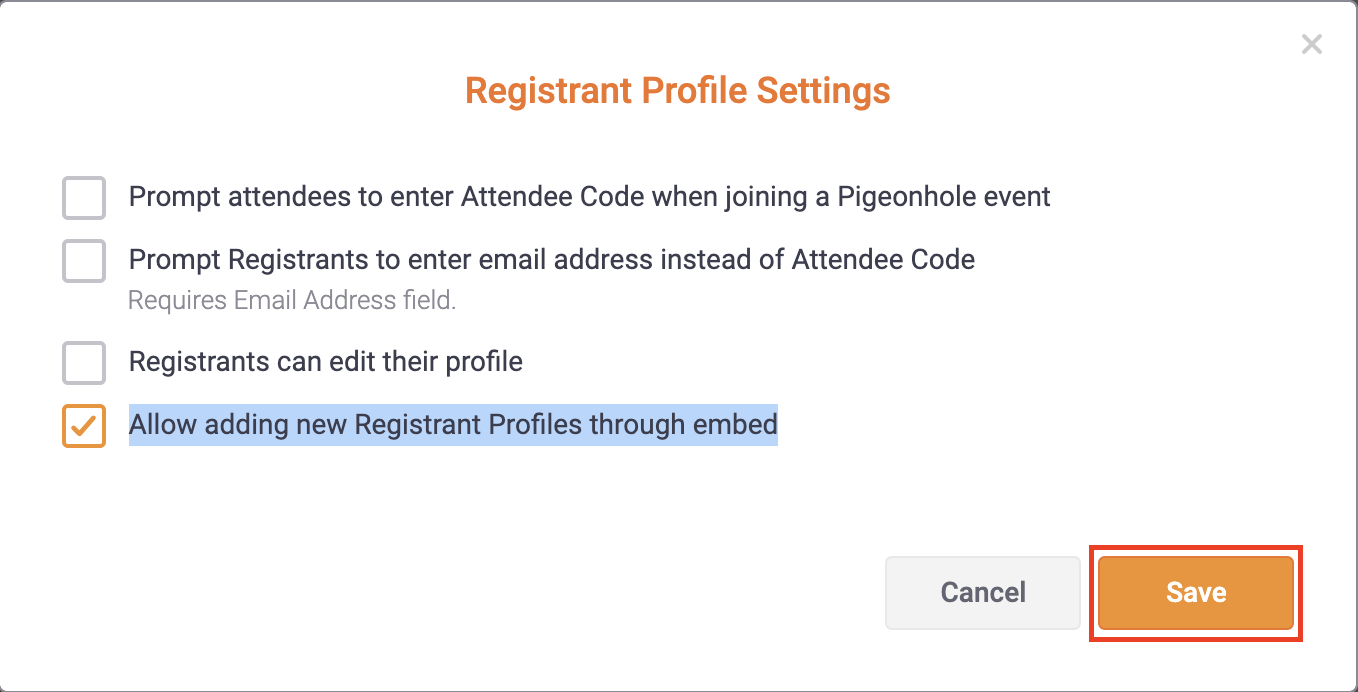
- Then check Allow adding new Registrant Profiles through embed option and click Save.
Creating a custom field
In order for the Virtual Event template to know which Pigeonhole to display for a video, a custom field is used. To create a custom field, follow these steps.
- Login to Video Cloud Studio.
- In the primary navigation, click Admin and then Video Fields. Note that you must be an account administrator to access to the Admin menu.
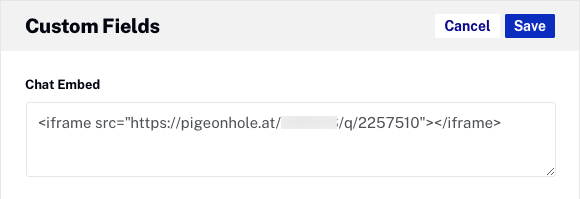
- Create a new custom field named Chat Embed.
- Confirm that the internal name is chat_embed.
- Set the Type to be Text.
- the custom field.
For information on creating custom fields in Video Cloud, see Creating Custom Metadata Fields.
Adding a Pigeonhole to a video
To have a Pigeonhole appear next to a video in the Virtual Event template, follow these steps.
- Open the Media module.
- Click on a video to open the video properties.
- Locate the Custom Fields section and click .
- Paste the Pigeonhole embed code into the Chat Embed custom field.
- Click .
Passing user SSO information to Pigeonhole
If your Virtual Event Experience is secured using SSO, it is possible to pass user SSO information to Pigeonhole so that users can be tracked inside of Pigeonhole. The following sections walk through the settings and steps that are needed to pass SSO information to Pigeonhole.
Map SSO attributes
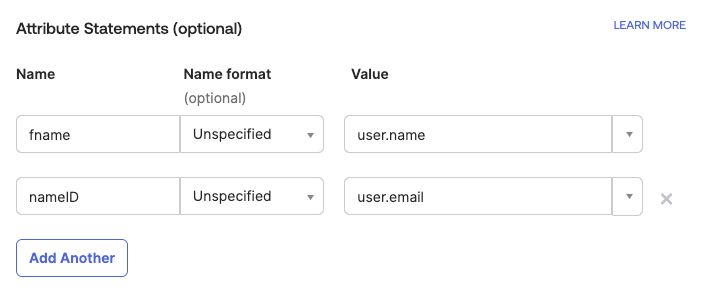
You need to ensure that the correct SSO attributes are mapped so they can be passed to your experience and then to Pigeonhole. The integration Pigeonhole looks for the following values:
fname- User's namenameID- User's email address
The example below shows these attributes being exposed from inside the Okta SSO Admin page.
Expose attributes in the Access Control Profile
Ensure that the Access Control Profile used to secure the experience has the Expose all attributes option checked. If the SSO information is not available, users will appear as anonymous in Pigeonhole.
- Open the Gallery module.
- Click the settings icon (
 ) on the home page.
 - In the left navigation, click Access Control Profiles.
- Click the edit icon for the profile being used to secure the experience.
- Ensure that the Expose all attributes setting is checked.

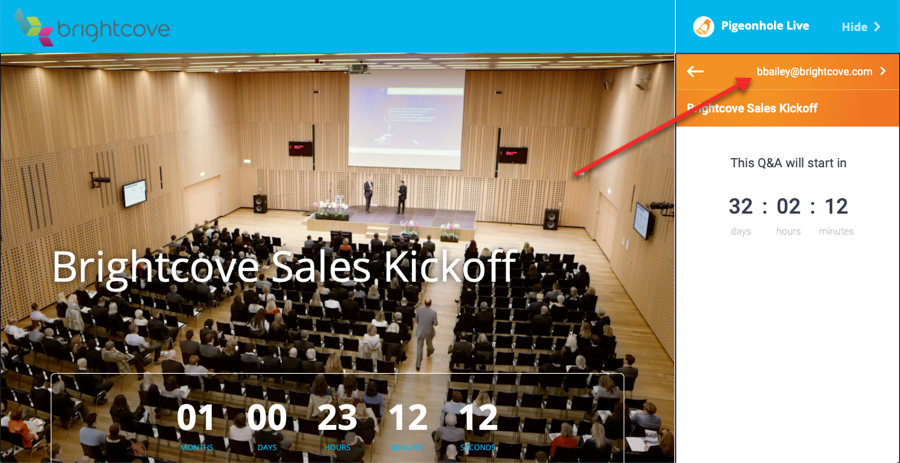
For information on configuring single sign-on, see Configuring Access Control Profiles. If everything is configured correctly, the user info will display in Pigeonhole when the viewer logs into the experience.
How attendees are tracked
If the SSO information is provided, Pigeonhole can generate a unique ID for the attendee that will be the same across all devices, browsers and sessions. This will reduce the chance for duplicate sessions being recorded which can happen if the viewer enters the experience using a different browser or device. Duplicate sessions may also happen if two or more experiences with a widget are embedded in the experience. If no SSO information is provided, then all the duplicate session apply here as well.