Assigning a Custom Domain to a Website Experience
Assigning a custom domain to a Gallery Website Experience provides a way to access the site at an easy to remember URL (vs. having a site-slug.bcvp0rtal.com URL). When using custom domains, you can also assign an optional path to the URL. Using paths allows you to utilize different templates, make microsites, campaigns, internal portals, etc, while still using the same domain. For example, videos.brightcovegallery.com can be expanded to also include paths like videos.brightcovegallery.com/event or videos.brightcovegallery.com/product. Paths allow publishers who have multiple sites and SSL to only have to setup SSL for one domain rather than each individual site-slug.
To assign a custom domain to a Website Experience, follow these steps:
- Edit the experience.
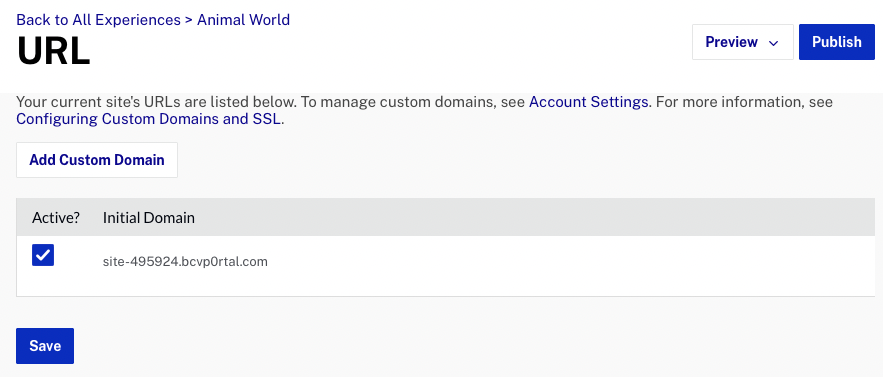
- Click Site Configuration > URL in the left navigation. The initial domain assigned to the site will be displayed.
- (Optional) Uncheck the Active checkbox to disable the
site-xxxx.bcvp0rtal.com domain. Typically publishers will disable thesite-xxxx.bcvp0rtal.comwhen using a custom domain so it is not indexed by search engines. - Click .
- By default, domains will be Active. Unchecking Active disables Gallery from routing on the entry but it does not free up the path/domain combination for use on another site.
- Select a domain from the drop down list. The list of custom domains that were configured as part of the Gallery settings will be displayed. By default, domains will be active.
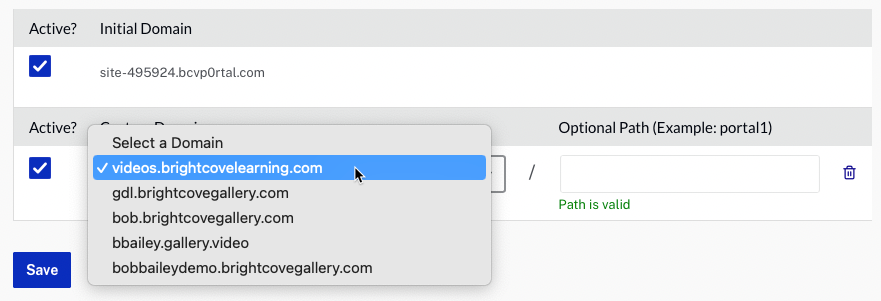
- Optionally, enter a path for the domain.
- Add additional domains for the site by clicking .
- When finished, click .
Click the delete icon (![]() ) to remove a custom domain.
) to remove a custom domain.
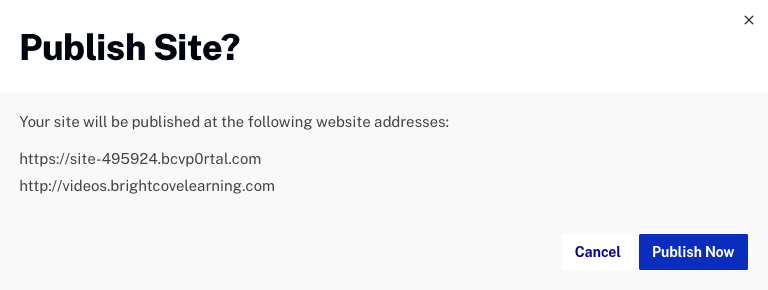
The list of custom domains will be listed in the publishing dialog.
To disable or remove any of the custom domains, edit the site, click Site Configuration > URL and uncheck the Active checkbox to deactivate the domain or click the delete icon (![]() ) to remove the custom domain.
) to remove the custom domain.