Role-based access control can be used to filter the sessions that appear in the session agenda based on a user's role. Role-based access control relies on a specified SAML attribute on the user object returned by the user management system (i.e. registration system, SSO). Rules are defined based on user roles and session tags. Brightcove recommends that all sessions have at least one tag for the role-based filtering to occur.
Before you get started
Before configuring role-based access control for a Virtual Event Experience, these initial setup steps should be completed:
- You should create a Virtual Event Experience and have created an event agenda.
- The Virtual Event Experience should be secured using an access control profile.
Roles and tags
To configure role-based access control, start by determining how the sessions will be restricted and then create the appropriate role-based access tags that will be assigned to each user and each session. For example, you may decide to use the following roles/tags:
- standard
- enterprise
- vip
Assigning roles to users in Auth0
All users in your SSO should be assigned a role. Follow these steps to assign roles to users using Auth0 SSO.
- Login to your Auth0 account.
- In the left navigation, click User Management > Users.
- Click on a user to view the user details.
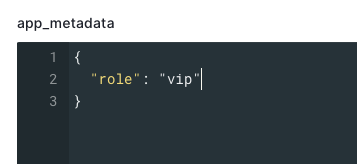
- Assign the appropriate role to the user in the app_metadata section. Roles should be entered using the format
"role": assigned role.In the following example, the user is assigned a role of vip.

- Click Save.
- Assign roles to all users.
Passing roles as SAML data in Auth0
In order to pass the role metadata from Auth0 to an experience, a rule needs to be created. A rule is JavaScript code that can be used to extend Auth0's default behavior when authenticating a user. Follow these steps to create a rule to pass the role data.
- Login to your Auth0 account.
- In the left navigation, click Auth Pipeline > Rules.
- Click + Create.
- Click < > Empty rule.
- Enter a Name for the rule.
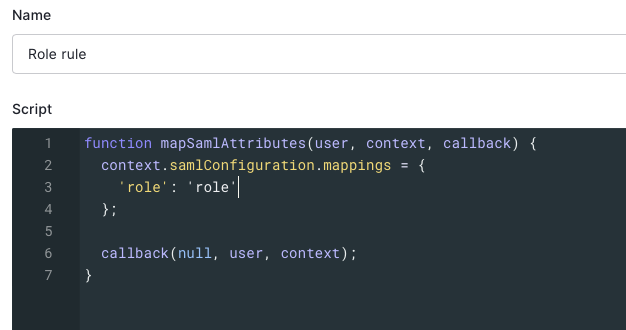
- Paste the following code into the Script area.
function mapSamlAttributes(user, context, callback) {
  context.samlConfiguration.mappings = {
    'role': 'role'
  };

  callback(null, user, context);
}
- Click Save changes.
Controlling access to event sessions
Access Control tags are used to restrict access to sessions. If a session has an Access Control tag of vip, the session will only appear for users with a role of vip. Follow these steps to assign an Access Control tag to a session.
- Open the Gallery module.
- Edit the experience.
- Click Site Features >Agenda in the left navigation.
- Click on the event agenda to open the agenda editor.
- Click on a session.
- In the Access Control tags field, enter the role(s) who have access to the session. In the following example, only users with the role vip will see this session in the agenda.

- Click .
Filtering the agenda based upon roles
Custom code will be used to filter the agenda sessions based upon the user's role. In this code example, sessions with no Access Control tag will appear in all user agendas. For sessions that have an Access Control tag, if the role parameter of the user matches the Access Control tag for the session, that session will appear in the user's agenda.
Follow these steps to add the filtering code to the experience.
- Open the Gallery module.
- Edit the experience.
- In the left navigation, click Header and Footer.
- Paste the following code into the Custom Header HTML field.
<script src="https://code.jquery.com/jquery-2.2.4.min.js" integrity="sha256-BbhdlvQf/xTY9gja0Dq3HiwQF8LaCRTXxZKRutelT44=" crossorigin="anonymous"></script>

<script>
$(document).ready(() => {
    // Get role from SAML data and Agenda sessions from site
    const role = window.bcGallery.filteredAssemblerData.samlAttributes ? window.bcGallery.filteredAssemblerData.samlAttributes.role : null;

    if (!role) {
            console.log("Error filtering Agenda sessions. No role specified on SAML data.");
            return;
          }

const sessions = bcGallery.filteredAssemblerData.site.agenda.sessions;

// Looking for sessions to be filtered out
const filteredSessions = sessions.filter((session) => {
// If session does not have tags, do not filter the session
if(!session["restricted_tags"].length) {
                return false;
            }
            const restrictedTags = session["restricted_tags"];
            if(!restrictedTags.includes(role)) {
              return true;
            }
            return false;
});

if(filteredSessions.length) {
    const contentWrapper = document.querySelector('.bcg-fixed-width-container');

    // Creating an observer to watch for DOM changes that might put back a filtered session
    const observer = new MutationObserver(() => {
        filteredSessions.forEach(session => {
            // Remove session item using its session id
            $(`[data-session-id='${session.id}']`).remove();
         });
    });

    observer.observe(contentWrapper, {
              attributes:    true,
              childList:     true,
              characterData: true
            });
        }
});
</script>
- Click Save.
Make sure you republish the experience so the changes appear.
