Adding Components to an Embed Experience
Components can be added to an Embed Experience allowing you to customize and brand the experience. To add components to an Embed Experience, follow these steps:
- Edit the experience.
- Click Layout in the left navigation.
- Click the plus icon (
 ) where you want to add a component and then select the type of component to add.
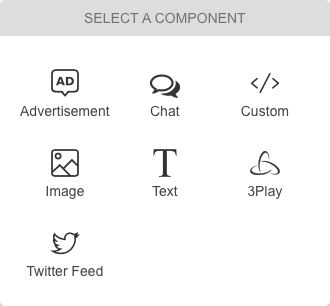
The following types of components can be added:
Adding an advertisement component
To add an advertisement to an experience:
- Click Advertisement on the component picker.
- Enter a Name for the advertisement.
- Enter the Header Ad Code and Ad Unit Code. Header Ad Code will be shared across all advertisements in the experience.

- Select when the advertisement should be displayed.
- Click . The advertisement will appear on the experience.

Adding a chat component
A third-party chat widget can be added to an experience to provide chat capabilities. To add a chat component to an experience:
- Click Chat on the component picker.
- Enter a Name for the chat component.
- Enter the chat HTML code.
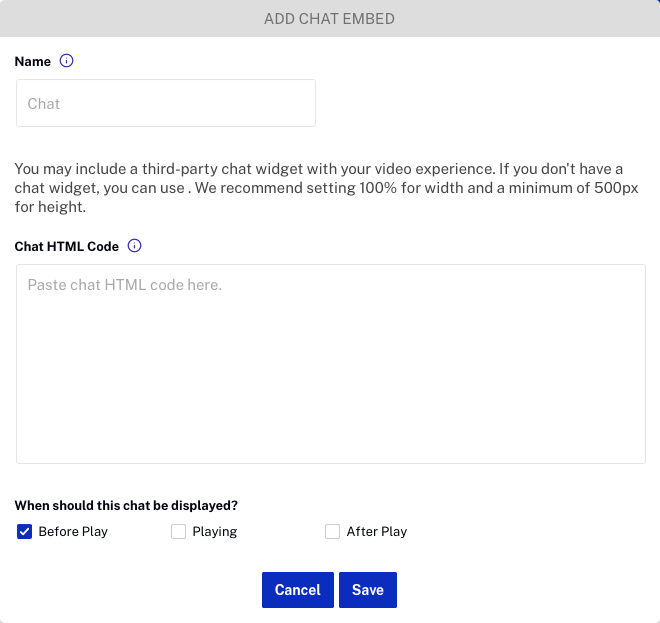
- Select when the chat should be displayed.
- Click . The chat will be rendered on the experience.

Adding a custom HTML component
Custom components can be used to add your own custom HTML to an experience. For example, if you have created a custom lead form using a marketing automation platform (MAP), the lead form HTML from the MAP can be added to an Embed Experience using the Custom HTML component.
To add custom HTML to an experience:
- Click Custom on the component picker.
- Enter a Name for the HTML component.
- Enter the custom HTML to add to the experience.
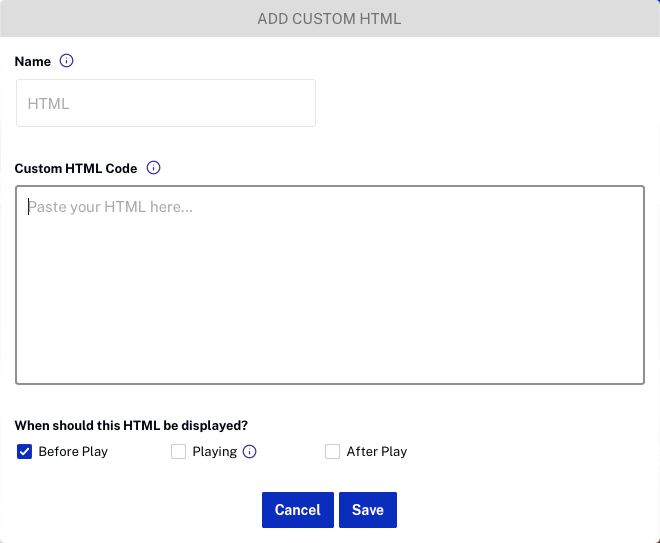
- Select when the HTML should be displayed.
- Click . The HTML will be rendered on the experience.
If no HTML is entered, an HTML placeholder will be displayed.
Adding an image component
To add an image to an experience:
- Click Image on the component picker.
- Enter a Name for the image.
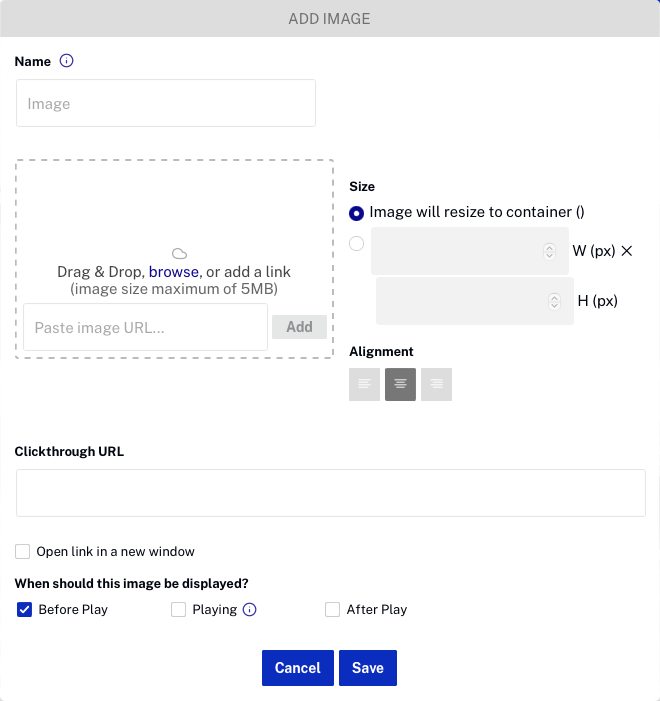
- To specify an image, you can:
- Drag an image from the file system and then drop it on the drop area
- Click browse and select an image from the file system
- Enter the URL to a remote image file
- Set the image Size.
- Image will resize to container - Images that are larger in size than the container they are in will be scaled down to fit. Smaller images will not be upscaled.
- Width and Height - Manually enter a width and height for the image
- Set the image Alignment.
- Enter a Clickthrough URL. This is the URL to go to when the image is clicked. You can also Open link in a new window.
- Select when the image should be displayed.
- Click to add the image to the experience.
If no image is selected, an image placeholder will be displayed.
Adding a text component
To add text to an experience:
- Click Text on the component picker.
- Enter the text to add to the experience. The toolbar can be used to format the text.
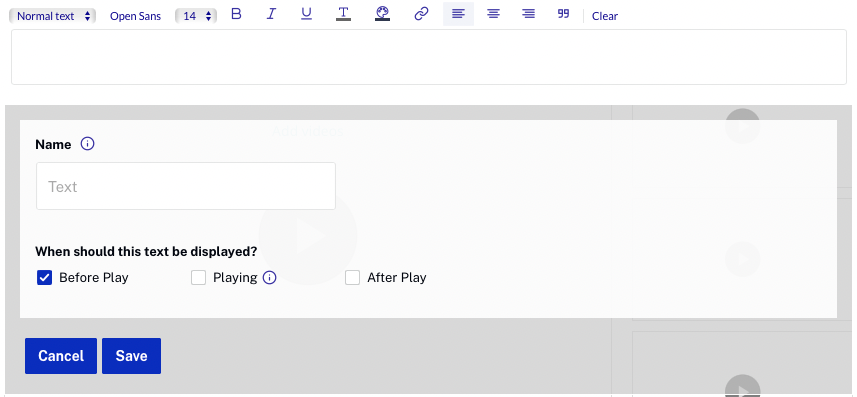
- Enter a Name for the text.
- Select when the text should be displayed.
- Click to add the text. The text will appear on the experience.
If no text is entered, a text placeholder  will be displayed.
Adding a 3Play component
3Play components can be used to add a 3Play interactive transcript to an experience. This component will only work if your video captions were generated by 3Play Media. When this component is added to an experience, a Show Interactive Transcript link will appear. When clicked, the video transcript will appear. In the following example, a 3Play component was added below the video player and was configured to appear during the Playing state.
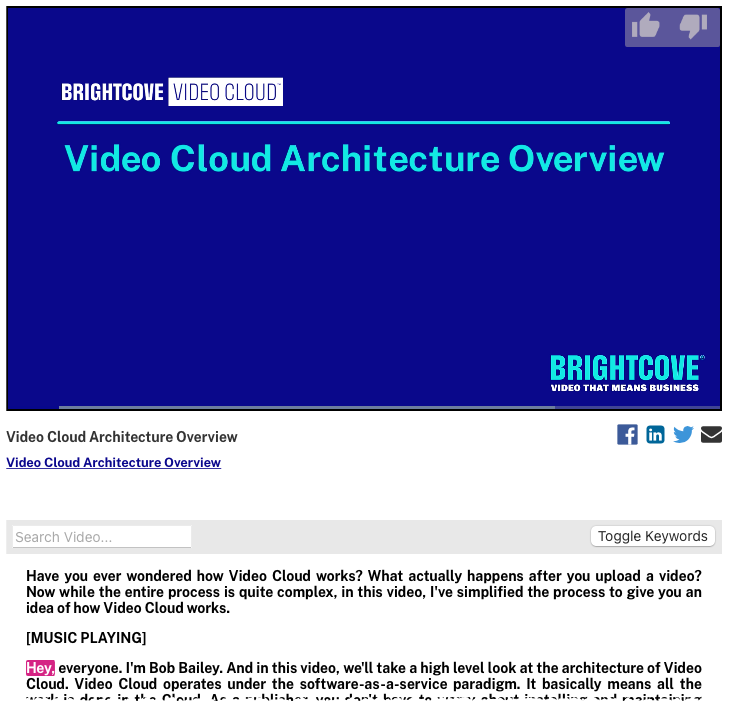
For a live example, see this link and play a video.
To add a 3Play component to an experience:
- Click 3Play on the component picker.
- Enter a Name for the 3Play component.
- Enter your 3Play Project ID. To find your 3Play Project ID, login to your 3Play account and click the Account Overview link in the page header. The Project ID will appear on that page.
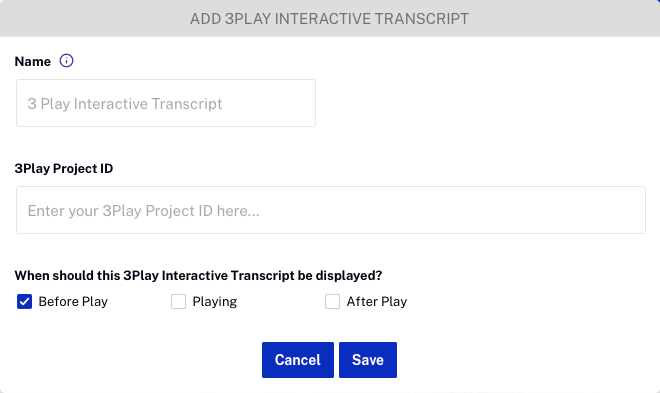
- Select when the 3Play component should be displayed.
- Click to add the 3Play component. The 3Play component will appear on the experience.

Adding a Twitter Feed component
To add a Twitter Feed to an experience:
- Click Twitter Feed on the component picker.
- Enter a Name for the Twitter Feed.
- Create a widget on the Twitter site. For help on creating a Twitter widget, see the Twitter developer documentation.
- Copy the HTML for the Twitter widget and paste it into the Twitter Feed settings.
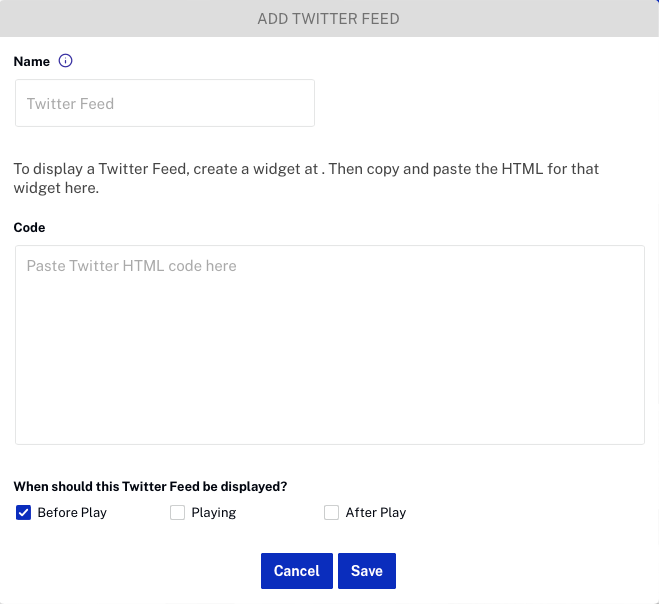
- Select when the Twitter Feed should be displayed.
- Click to add the Twitter feed. The Twitter feed will appear on the experience.