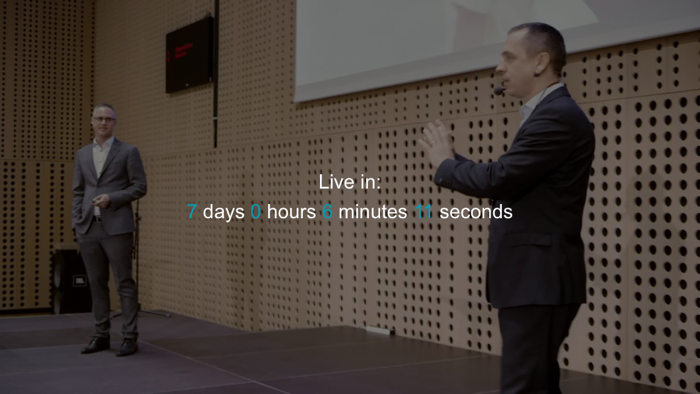
Simulive is short for simulated live and is a way in which VOD content can be shown to end users as if it is live. Simulive content is appealing to event organizers as it allows for pre-recording of content and extensive testing prior to go-live. It reduces risks that may arise from potential day-of failures for traditional live events which occur due to encoder issues or other logistics. Simulive videos will display a countdown timer with the video to indicate when it will be live. The example below is a simulive video in the featured collection.
For videos in the primary and secondary collections, the countdown timer will appear on the card for the video.

To use simulive content in a Virtual Event Experience, the following must be done:
- Configure the simulive player plugin
- Associate the player with the experience
- Create a simulive custom field
- Configure simulive video properties
Configuring the simulive player plugin
The Simulive player plugin should be configured for the player used in your Virtual Event Experience. Contact your account manager to get the information needed to configure the plugin.
- Open the Players module.
- Brightcove recommends creating a dedicated player for your Virtual Event Experience. If you haven't created a dedicated player, click , name the player and then click .
- Click the link for the player you want to configure.
- Click Plugins in the left navigation menu.
- Click Add a Plugin > Custom Plugin.
- For the Plugin Name enter
simulivePlugin. - For the JavaScript URL and CSS URL, use the values provided by your account manager.
- Click to save the changes.
Configuring a custom player
To configure the Virtual Event Experience to use the custom player, follow these steps.
- Open the Gallery module.
- Edit the experience.
- Click Video and Playback > Player and Lead Form in the left navigation.
- Select the Use site-specific player option and select the player configured with the Simulive plugin.
- Click .
Creating a simulive custom field
A custom field is used to store the date and time a video will be available. To create the simulive custom field, follow these steps.
- In the primary navigation, click Admin and then Video Fields. Note that you must be an account administrator to access to the ADMIN menu.
- Click .
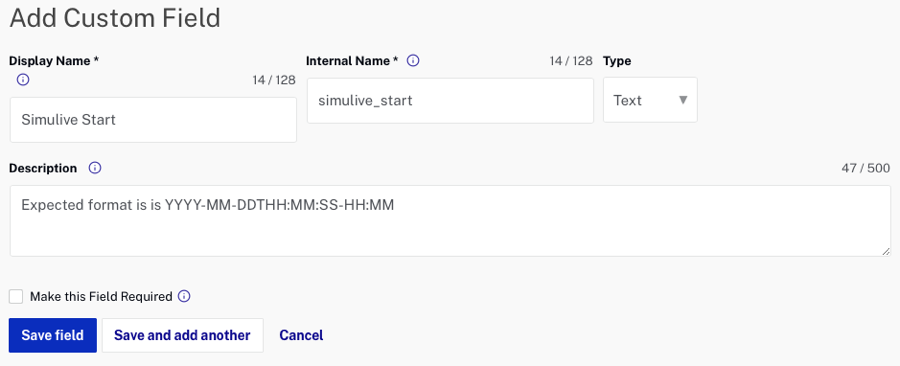
- Create a new custom field using the following values.
- Display Name - Simulive Start
- Internal Name - simulive_start
- Type - Text
- Description - Expected format is is YYYY-MM-DDTHH:MM:SS-HH:MM
- Click .
Configuring simulive video properties
The custom field Simulive Start will hold the date and time a video will be available. The video will not be viewable until the Simulive Start time has been reached. Simulive videos must also be tagged simulive. To configure a video as a simulive video, follow these steps.
- Open the Media module.
- Click on a video title to open the properties.
- Locate the Video Information section and click .
- Tag the video with simulive.

- Click .
- Locate the Custom Fields section and click .
- Enter a date and time value for the Simulive Start field.
The correct format of the field is
YYYY-MM-DDTHH:MM:SS-HH:MMwhereYYYY-MM-DDis the year, month and date with leading zeroes as appropriate,HH:MM:SSis the 24-time hour, minute, and second with leading zeroes as appropriate, and-HH:MMis the timezone offset (for example, -04:00 for UTC-4, +08:30 for UTC+8.5, etc).
- Click .
Simulive player plugin options
The Simulive player plugin options (JSON) can be used to customize the behavior of the simulive plugin. To configure the simulive plugin options, follow these steps.
- Open the Players module.
- Click the link for the simulive player.
- Click Plugins in the left navigation menu.
- Click the plugin to open the plugin properties.
- Add the appropriate options documented in the table below.
- Click to save the changes and then publish the player.
Sample plugin Options (JSON)
{
  "labels": {
    "countdown": {
      "live": "Live in:",
      "day": "day",
      "days": "days",
      "hour": "hour",
      "hours": "hours",
      "minute": "minute",
      "minutes": "minutes",
      "second": "second",
      "seconds": "seconds"
    },
    "ended": "Live event has ended."
  },
  "customStartFieldName": "simulive_start",
  "customEndFieldName": "simulive_end",
  "tagValue": "simulive",
  "playlistInSuccession": false,
  "modalAfterEvent": 1
}
Plugin Attributes
| Attribute | Type | Default | Description |
|---|---|---|---|
customEndFieldName |
String | simulive_end |
Should match the Internal Name value of the Simulive End custom field defined in Studio. The plugin will attempt to match this string against player metadata keys to get the simulated live event’s end date/time. |
customStartFieldName |
String | simulive_start |
Should match the Internal Name value of the Simulive Start custom field defined in Studio. The plugin will attempt to match this string against player metadata keys to get the simulated live event’s start date/time. |
debug |
Boolean | false |
Setting to true will turn on debug logging for the plugin. |
labels |
Object | An object with countdown and ended values | An object describing the wording of the initial countdown modal and the final bookend modal. |
labels.countdown |
Object | An object with the following default key/value pairs:
|
An object describing the individual parts of the initial countdown modal. With specific differentiation between singular and plural formats for time increments. |
labels.ended |
String | Live event has ended. |
A string used in the final bookend modal at the end of a live event. This appears only if modalAfterEvent is set to 1 or 2. |
modalAfterEvent |
Number | 1 |
If 0:
If
If
|
playlistInSuccession
only applicable when using a playlist
|
Boolean | false |
If false, the countdown timer will be displayed before each video in the playlist given that each video has a valid timestamp added.On true, the countdown timer will ONLY be displayed before the start time of the first video in the playlist and all other videos will play back-to-back. |
tagValue |
string | simulive |
All videos using simulive features must have a consistent tag. simulive is suggested but if a custom tag is preferred, it can be set here.The Simulive plugin will not activate features unless one of the video content tags match the tagValue string.
|